Friday, December 28, 2018

A New Glovebox For My Dune Buggy..... Part One

As most of you already know I purchased a rather flashy looking little dune buggy shortly before Christmas.  I have been getting all of the paperwork done to get it licensed, registered, and insured so I am happy that all of that work is done.  I still have a couple more projects planned for the dune buggy and one of them is to add a glove compartment to it.  Currently it does not have one so I thought it would be a good thing to add to the car just to store my registration papers along with sun glasses and maybe some sun tan lotion for the summer sun.  


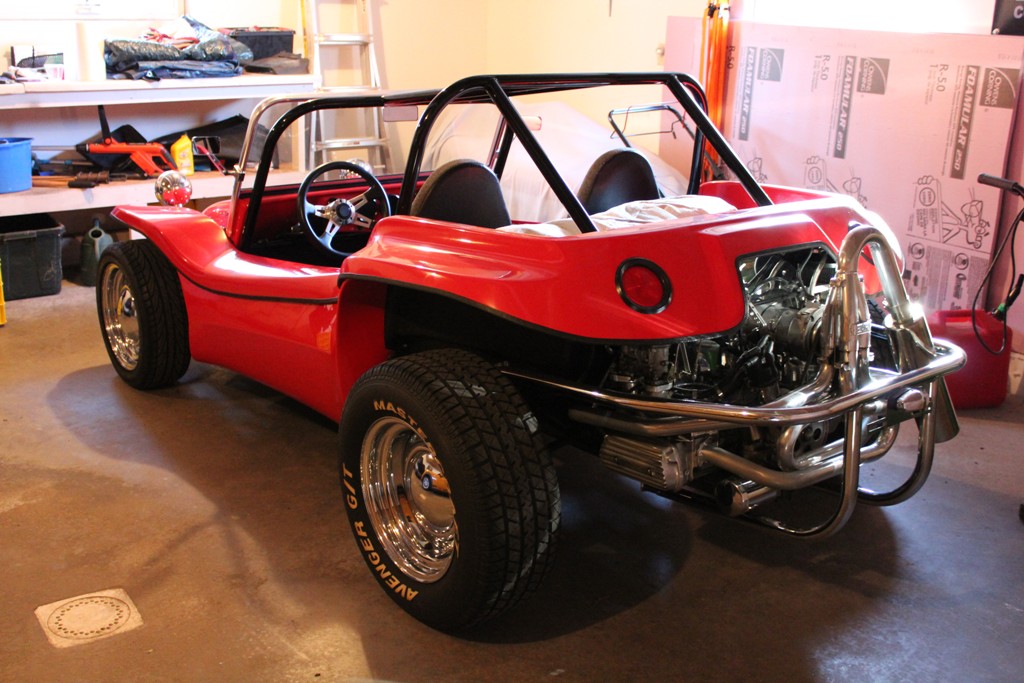
Here's another chance for me to show off my little beauty once again so that if you have not already seen it on my blog before now's your chance.


Here's a good shot of the interior of the buggy and as you can see there is a rather large looking void in the right side of the dash where a glove compartment would normally be in any other car.  In this photo the space for the glove compartment looks huge but in reality it is about average size. The big trick to getting a glove compartment made was trying to figure out the exact shape needed to fill this void in the dash as closely as possible so it would look right in the car. 


Here you can see the nice rounded shape of the dash that is just ahead of the passenger. The roll cage cross member that is horizontally mounted and is under the gauges in the dash looks just a bit out of place with no glove compartment so I started scratching my head to try and figure out the best plan of attack to make a glove compartment fit into this odd shape.


I started with a piece of foam core that I had in my work room and cut out a shape the I thought would fit nicely as the base for the compartment and line up fairly well with the lower shape of the dash. I taped this piece in place with masking tape to hold it where I needed it while again trying to figure out the rest of the compartment. On the right side of the roll cage is a mounting plate with a bolt running through it and this had to be cleared when inserting the base plate made of foam core.  Another obstacle to get around for the glove compartment.


I next added 1/4" Styrofoam strips to the rear edge of the base plate foam core.  I hot glued these in place to one another as I did not want to get any hot glue on the dash itself. Next I taped down an upper foam strip where I wanted the glove compartment to be at it's highest.  Then I started adding more foam strips between the upper and lower horizontal strips and hot glued these together.  The reason for the strips was so that I could get an accurate profile of the original dash to make a mold for the new fiber glass glove compartment later on in the project.


Here all of the vertical Styrofoam strips have been installed and hot glued to each other. Again no gluing was done directly on to the original dash as I did not want to cause any damage to the anything and this entire assembly needed to be removed in one piece. 


To complete the shape of the glove compartment I added several triangular foam core pieces on both ends of the enclosure.  These pieces took me a little time to get correct as the back surface of the triangles needed to be curved to match the shape of the new compartment. Again as before I hot glued these in place. 


With all of the foam pieces and foam core hot glued together I was able to pull the entire assembly for the glove compartment out in under a second.  So I was happy that it came out so easily and fit perfectly into the cavity in the dash.  As you can see the shape of the glove compartment is at this point looking rather small and very odd shaped.  But at least I have the general shape at this point so I can proceed to figure out the next steps in the project.


Here I've added a piece of foam core just to get and idea of how the door would be attached to the glove compartment. You can see a cut out in the lower right corner of the compartment and this as I said earlier is needed to avoid hitting the mounting hardware that is used in the roll cage assembly.


At this point in the project I knew that I wanted to have a lock for the glove compartment.  I tracked down an original compartment lock for an original 60's era VW.  This only cost me $17 with free shipping and was the perfect lock for the project.  Very small and brand new at that. 


I knew that I did not want the door striker plate for the lock to be made out of plastic as this much sooner or later would wear out and have to be replaced.  So I came up with this little striker made out of a small piece of aluminum that was in my supply of parts in the shop.  As you can see it is not very large. This I mounted to an adjustable bracket for the striker assembly.


This was the first design I came up with for the face of the glove compartment.  As you can see I did not have the correct lock at this point and have the cutout for the roll cage mount. This caused several issue with the glove compartment as it made the door smaller and you could see hardware on the face of the door frame. On top of all of this the shape of the Styrofoam and foam core (plug?) came to a rather tight angle at the top of the compartment which left very little room for the lock to work at all.  Something had to change. 


The only choice I had to keep the project moving forward was to extend the glove compartment out one inch to make room for the lock and the striker.  This gave me a roomier glove compartment and the needed space to make the lock and door striker work properly.  I also was able to eliminate a bunch of bolts for the door frame.  This cleaned up things nicely for the look of the compartment as well as giving me a larger door opening.  The recessed bolts that hold the hinge mounting hardware will be bonded into the door when it comes time to do the finishing work on the project. This will make the glove compartment more secure as well. 


Here's a good look at the door and door frame assembly with the door lock and striker installed.  The blue pieces mounted to the inside of door are retaining clips that hold 1/4" aluminum pins that are used as hinges for the door. The tabs that stick out of these clips on both sides of the door are there to keep the door from opening to far when it is unlocked for use.  The door will only rotate from vertical to horizontal a total of 90 degrees.  A simple and effective way to hold the door in place and in position. 


Here's a nice look at what the door assembly will look like from the outside.  Again the recessed bolts will be bonded into the door which will make them more secure, better looking and become permanent studs for the hinge pin retaining clips.


Here's a good look at the hinge pins that will be mounted in the door frame.  These pins as I said earlier will hold the door in place with the help of the hinge pin retaining clips.  This setup also makes it easier to install the door or remove it if it becomes necessary in the future. 


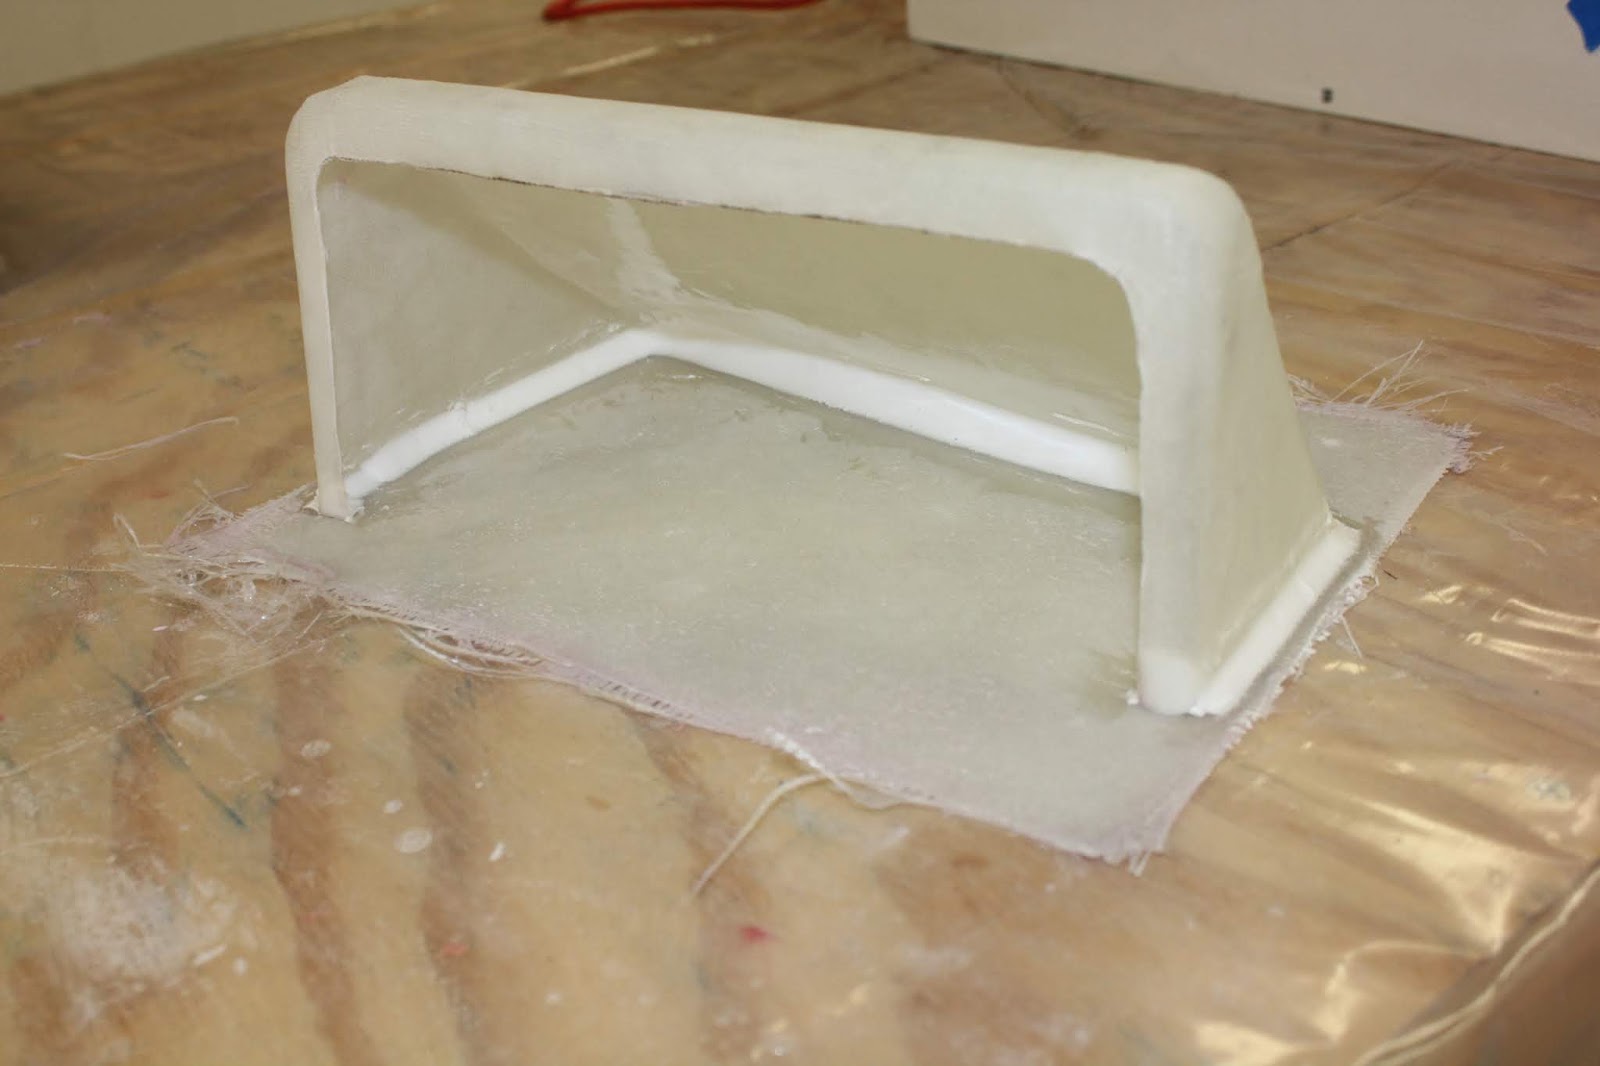
With the design finally sorted out I went ahead and added the addition one inch of Styrofoam to the Styrofoam and foamcore plug.  Then I sanded it into shape, rechecked that it still fit into the dune buggy properly, wrapped it in clear packaging tape and then fiber glassed only the top surfaces as shown in the photos above.  I wanted to be able to get the foam plug out of the fiber glass so I left the bottom open for easier access in this portion of the build. With the clear packaging tape on the outer surface of the plug it would give me a nice smooth finish on the inside of the fiber glass part and also make it easier to remove the new compartment from the plug. 


After I let the fiber glass cure overnight I was able pop the new fiber glass compartment off of the plug in less than five minutes.  I used some popsicle sticks to pry the fiber glass loose from the plug and tapped it with a rubber mallet to release the upper portion of the new part.  I now had a new fiber glass housing for the glove compartment that fits perfectly into the dune buggy and was nice and smooth on the inside as well. 


I took a Dremel tool and cut out the front area of the housing where the door frame for the compartment would be mounted. I did not need to add any additional fiber glass to the interior of the compartment as it was plenty stiff enough at this point.


To make the bottom of the compartment I took a piece of one inch Styrofoam and fiber glassed the top surface with six or seven layers of 8 oz. fiber glass cloth.  This gave me a nice stiff section to work with for the base of the compartment.  I removed the Styrofoam and then sanded the new panel smooth. I then took fiber glass resin and micro-balloons to make a putty mixture to join these two pieces together.  


To finish of the compartment I next added the door frame that I 3D printed a couple of days earlier. This slid into place very nicely. I bonded this to the fiber glass compartment after having marked and trimmed the front lower fiber glass surface.  It was simpler to remove this portion of the fiber glass before I added the door frame.  I did not want to mess up the door frame after it was installed.  

That's about it for this post.  Once I get the door 3D printed I will be able to put all of the rest of the parts together for the compartment and work on the mounting hardware that will need to be created to install it into the dune buggy.  When I get all of that figured out then I will take the compartment out of the car, tear it apart and prep it for primer and paint. So lots to do yet.  I'll fill you in when I get farther along.  Have a good day in your shop!

Sunday, December 16, 2018

Merry Christmas!


Hard to believe that another year is almost completed and Christmas is less than ten days away. I have had lots of new projects this past year along with many new people reaching out to me about what I design, build and blog about. All of you lift my spirits week after week with the comments and emails that I receive. Amazing to say the least.

 I wish to thank all of you for keeping my blog alive and thriving all these years.  Because of you faithful visits to my blog it has surpassed the half million mark and still moving forward on a daily basis. You are the people that keep me going.  

With all of this in mind I want to wish everyone of you a very Merry Christmas and I hope the New Year brings you as much happiness as you have given me once again this past year. May all your projects that you dream about and build come together faster, easier, and cheaper than you ever could imagine. Thanks for all your visits to the blog!

Wednesday, December 12, 2018

New GPS Mount For My Dune Buggy

With all that is going on this holiday season it takes a bit more time to get a project done much less post about it on the blog.  But I did not want to let anyone think that I was sluffing off so this week I wanted to show you what I have been up to.  

With the arrival of the new dune buggy I have found several small projects that I wanted to get at that will improve either the look of the car, it's function or both.  The first being a place to mount a GPS.  First off a dune buggy does not have a dash like a normal car.  There is no place to mount a GPS on top of the dash and I really did not want to stick a suction cup on the windshield and hope that the GPS did not fall off while I was using it.  Also I did not like the idea of having to plug it into an accessory port and have a wire going to it either. 

What I did find was that the steering column had a flat surface on the top of it large enough to mount a GPS right in front of the steering wheel.  The speedometer is not in front of the steering wheel so it looked to be the right place for the GPS. The steering column is not cylindrical but rather rectangular in shape and it also had two well placed slots on the top of the column that ran through the entire column.  So a plan of action was hatched to mount the GPS there and run it on it's internal rechargeable battery.  


I started with this simple mount for the steering column. The upper mount has a stem and ball attached to it and bolts run down through this mount and the steering column and finally through another small mount on the bottom of the column.  The ball on the top mount mates up to a connector that you will see in the following photos.  One thing that I did not like was the look of the wiring that came from under the dash and went into the column.  It was wrapped up ok but did not look as finished as I wanted it so changes needed to be made. 


Using Fusion 360 CAD software I created a new design that I used to modify the lower mount so that there was a cover that could hide all of the wiring going into the column.  I also removed one bolt for this mount as it interfered with the wiring.  I did not remove the hole from the upper mount as I knew how to make the mount look right and still not actually have four bolts for mounting the assembly.  I will explain what I did in a little bit.


Now with the new lower mount I had a nice clean installation which the cover now hides the wiring very easily. The upper mount with only three bolts holds everything securely.  But to make it all look right it was just a simple matter of adding a fourth bolt but only much shorter.  This bolt is only to make the assembly look good and is only hot glued in place.  A dummy so to speak.  It works so I am happy with it. 


Next on the upper ball mount is added the connector and mounting bracket for the GPS. This connector and bracket can be added or removed from the column in just a minute or so.  So it will be easily removed and locked away when I need to leave the dune buggy unattended. 

 
The GPS locks into place quickly and now is ready to use.  With it's internal rechargeable lithium battery it will run for seven hours until it needs to be recharged.  More than enough for a day of driving. 


The GPS is easily readable through the steering wheel and does not block my speedometer, tac, or other gauges. 


I am still working on a small sun shade that will slip on to the GPS and should help when the top is off of the car on a sunny day.  Once I get this completed I will put out another short post about it and how it looks on the GPS as well. All of the mounting hardware for the column and the sun shade were 3D printed after I designed then using Fusion 360 software so if anything needs to be repaired or replaced it is just a matter of making a new piece if I have to.  

The GPS will be a nice addition to the dune buggy.  The fact that I can easily remove it and not have ugly wires dangling down from it to a power port makes the installation perfect for the car.  I really like the look of the mount too so it blends in very well with the finished interior. 

One more project for the dune buggy and I think I will be done making upgrades to the car.  I will post about the final project once I put the finishing touches on it.  Until then I hope your projects are going as well as this one has for me. 

Saturday, December 1, 2018

3D Printed License Plate Mount For My Dune Buggy!

With the arrival of my new dune buggy I have found it necessary to press my 3D printer into service once again. Not so much that I needed to make something to spruce this little beauty up but rather having to make something that is useful and needed.


The car was originally put together in Arizona and later on sold to a gentleman in Florida.  Both states do not require a front license plate.  The fact that I live in Wisconsin changes all of that being that both a front and rear license plate are a requirement here.  As you can see from the photo above there is no front plate on the dune buggy and even if I mounted one on to the front of the body it would be hidden by the front bumper guard.  Thus the reason to press my design skills and 3D printer into service for this weeks project.

I was happy when the dune buggy arrived so that I could get proper measurement of the front bumper guard for this project. This is where I planned on mounting the new license plate.  I had to work up some kind of mounts that would attach to the bumper and hold the plate properly so that it could be installed easily and in the end be very visible.  On top of all of this I wanted something that looked good when this project was completed.


I started this project using Fusion 360 CAD software like I normally do and laid out just a section of the front bumper and the mounting parts that are bolted to the vertical center supports.  The black pieces for this part of the assembly (shown above) needed to be mirror images of one another so that the assembly would be set up correctly.  This was an easy task in Fusion 360 as one part is created it can easily be duplicated and mirrored to get the next correct part made.


Next the mounting brackets for the license plate mounting plate were designed.  On the right in the image above you can see a black "D" shape on the inner face of the mounting bracket.  This was made so that the black down tube mount would slide into the mounting bracket and not spin.  A bolt and nut are then added to secure the yellow parts to their mating black parts. 


I then designed a simple drill guide for the license plate mounting plate.  This drill guide helped me make sure the holes for the mounting plate were drilled correctly and would mount up to the yellow brackets in the assembly.  


Here is what the license plate mounting plate looked like for the assembly. The slots for the yellow brackets were changed from holes just to make sure the assembly would go together smoothly.  


The license plate mounting plate then is bolted to the yellow brackets and now the assembly is looking like a real license plate mounting assembly.  All that is needed then is the license plate that will be mounted to the four holes at center locations shown on the mounting plate above.


Here finally after hours of 3D printing is the finished parts assembled on the front bumper of dune buggy. All of the parts printed very well and the assembly was a simple task of bolting everything in place.  I will make sure to add Loctite to all of the bolts just to make sure that nothing vibrates loose while driving. 


Here's a good view of the license plate brackets mounted with the drill guide attached to the assembly. I thought it best to double check my measurements by using the drill guide first before finding out later that I had messed up and now have to remake the license plate mounting plate over again.  At this point everything looked good so to make double sure I changed the holes for these brackets on the license plate mounting plate to slots to make doubly sure that the assembly would work properly.


In the photos above the license plate mounting plate was added to the assembly.  I was correct in adding slots to the mounting plate as this part slide right into place and worked perfectly.  The mounting plate I did not 3D print as I thought it best to find something already online that would work just as well.  The mounting plate is 1/4" plastic already cut to 6" X 12" in size for only $7.00.  The perfect size and very light weight and strong for the project. Plus I didn't have to wait for hours to have it made on my 3D printer.  Oh sure I could have but I thought for a couple extra bucks it was worth it for the project. 


Here's the final result of the project.  A nice clean installation ready for my license plates when they finally arrive from the DMV.  I think the look of the assembly works very well with the dune buggy so I call this project a done deal. Check another one off of my to do list. Yes!

Sunday, November 25, 2018

The Dune Buggy Has Arrived!

As usual lots of things have been happening here at the workshop so my postings get a bit delayed.  But this posting is worth the wait as my new (old) dune buggy has arrived and is now safely stored in my garage. The dune buggy started out as a 1970 VW Beetle.  A gentleman in Tucson Arizona took six years to build it.  He then sold it to another man in Florida who had it for a few years and then I now own it.  It only has 2200 miles on it.  The underside looks as good as the topside.  Not a mark on it anywhere.  I am amazed and proud to call it mine.


Isn't she a beauty?  I am so tickled to finally have it here so I can keep it out of the winter weather and work on it all at the same time.  In an earlier post I was looking at enclosing the storage area just behind the seats so the I could lock things away when the dune buggy was left parked somewhere.


This is what I had in mind.  But like all ideas, plans sometime need to change.  This actually was the case with this idea.


Behind the seat is a very nicely padded vinyl covered deck with a small "T" handle at the front just between the seats.


The "T" handle opens up this deck to have access to the battery that is just behind the passenger's seat.  On the opposite side behind the driver's seat is a small storage area as well.  The only issue I had with this is that the deck lid did not lock.  I tried to remove the entire deck but was not able to being as it looks like the deck was installed before the body was mounted to the frame of the car.  So I could not remove the deck and in not being able to the idea of making an enclosed trunk area went out the window. 

So the next best thing and the simpler idea was to put a lock on the deck itself.  It would still give me a safe place to store at least smaller items and be much simpler to accomplish than designing and building and entire trunk. 
That lock that I needed for the deck to secure it was a cylinder lock like the one shown above.  The deck itself is made up of 3/4" plywood with a 1/2" of foam padding covered in black vinyl.  It was very well made so I did not want to destroy it by installing this lock.  That was the first goal to be sure. The issue I had was that the lock had to function properly but I did not want to have to jump through flaming hoops to get it installed. 


When the deck lid is closed it rests on a wooden support just behind the seats.  This again was made very well so I did not want to hack it up just to put a lock in.  What I figured would be the simplest thing to do is to recess the lock so that the metal latching arm would rotate underneath of the front wooden support.  I made a test part first just to see how I would accomplish this task.  

In the photo above you can see a small piece of wood that I cut a 1 1/2" diameter counter sink into and then drilled out the center to 3/4" to receive the lock.  This looked to be what I needed but this was done on a drill press and I could not do the same with the deck lid as it could not be removed from the dune buggy.


I first drilled a pilot hole through the underside of the deck lid making sure to mark the exact position of the center of the lock.
In order to keep my pilot hole perpendicular to the underside of the deck I first drilled another pilot hole through a small piece of scrap wood on my drill press. This I then used as my guide to keep my drill aligned properly to the underside of the deck lid.

 Once the pilot hole had been drilled into the deck lid I then marked a circle with a Sharpie where the vinyl on the top of the deck needed to be removed. (Scary to say the least).  Now with the vinyl out of the way I again drilled a counter sunk 1-1/2 inch diameter hole only down 3/8ths of an inch.  I worked slowly and as I did not want to mess this up.  After the large counter sink was finished I then drilled the 3/4 inch hole for the lock.  Clean up the wood chips from my drilling was next and I was able to mount the lock as shown above. 


With the lock installed I tightened up the nut to secure it and it looked good from the underside.  I closed the lid and it locked and unlocked perfectly.  I could breath again.  


The next step was to clean up the look of the recessed lock on the top side of the dune buggy deck. This was the simplest part of this project.  I wanted a nice clean look to the installation and I did not want to compress the foam and vinyl in the process.


I designed this simple ring using Fusion 3D CAD software that would be inserted into the 1-1/2 inch diameter counter sink that I made for the lock.  I then 3D printed the part, sanded it smooth, primed and painted it gloss black. It turned out great. 


Then it was just a simple matter of sliding the part into place to finish off the installation of the lock.  The lock looks kind of deep but the key goes in easily with more than enough room to turn it and remove it so it is all good.  I really like the look of the gloss black paint.  I did not glue this part in place as it is a friction fit into the countersink for the lock.  I thought this way if this little ring needed to be repainted it would be a simple task to remove it and spruce it up and reinstall it.  If it was glued in there would be little hope of making it look like new again.

Now I have a lockable storage space for the dune buggy.  Not a large space but at least large enough to throw in a camera, jacket, my lunch and maybe even a small cooler. The cooler idea I have done for my motorcycle so I know I could make a custom one for the dune buggy as well.  Anyway I am happy that this addition to the dune buggy has worked out very well and will be a welcome addition to using the car. 

I have a couple more projects for the dune buggy that I will post about as I get into them.  Hope your latest project is going good for you as well.