Sunday, November 26, 2017

Lancia Stratos Blender 3D Project Pt. 4

I've managed some nice progress on my Lancia Statos Blender 3D project over the past couple of days. With this project I have learned a few new things along the way and managed to make some nice improvements with my model making.  This is always the case with working with any project I create in Blender.  Lots to learn along the way and so my models seem to improve like anything else would with practice.  So here are the latest images and progress so far.

(Click on the images for larger views)

As usual with my car modeling I experiment with lighting early on just to get some idea of where I want the completed model to end up.  But this usually changes as I progress either with different lighting that is far better than when I start out.  But at least with the images you see here you can get and idea of the potential of how the car will look once I am done fussing with it.


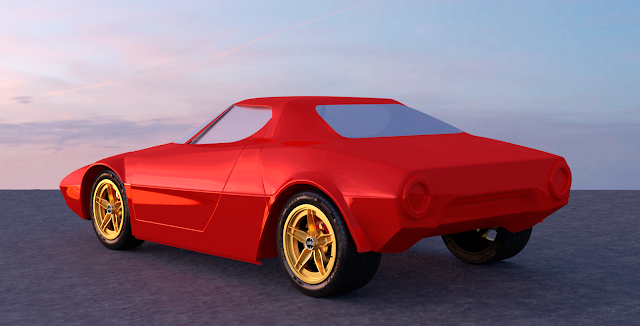
The model now has the wheels, tires, and glass installed but I will still need to add things like the lights (front and rear) and window trim, door handles, and the list goes on from there. The image above you can see there is no exhaust, tail lights, license plate too. Lots to do yet.


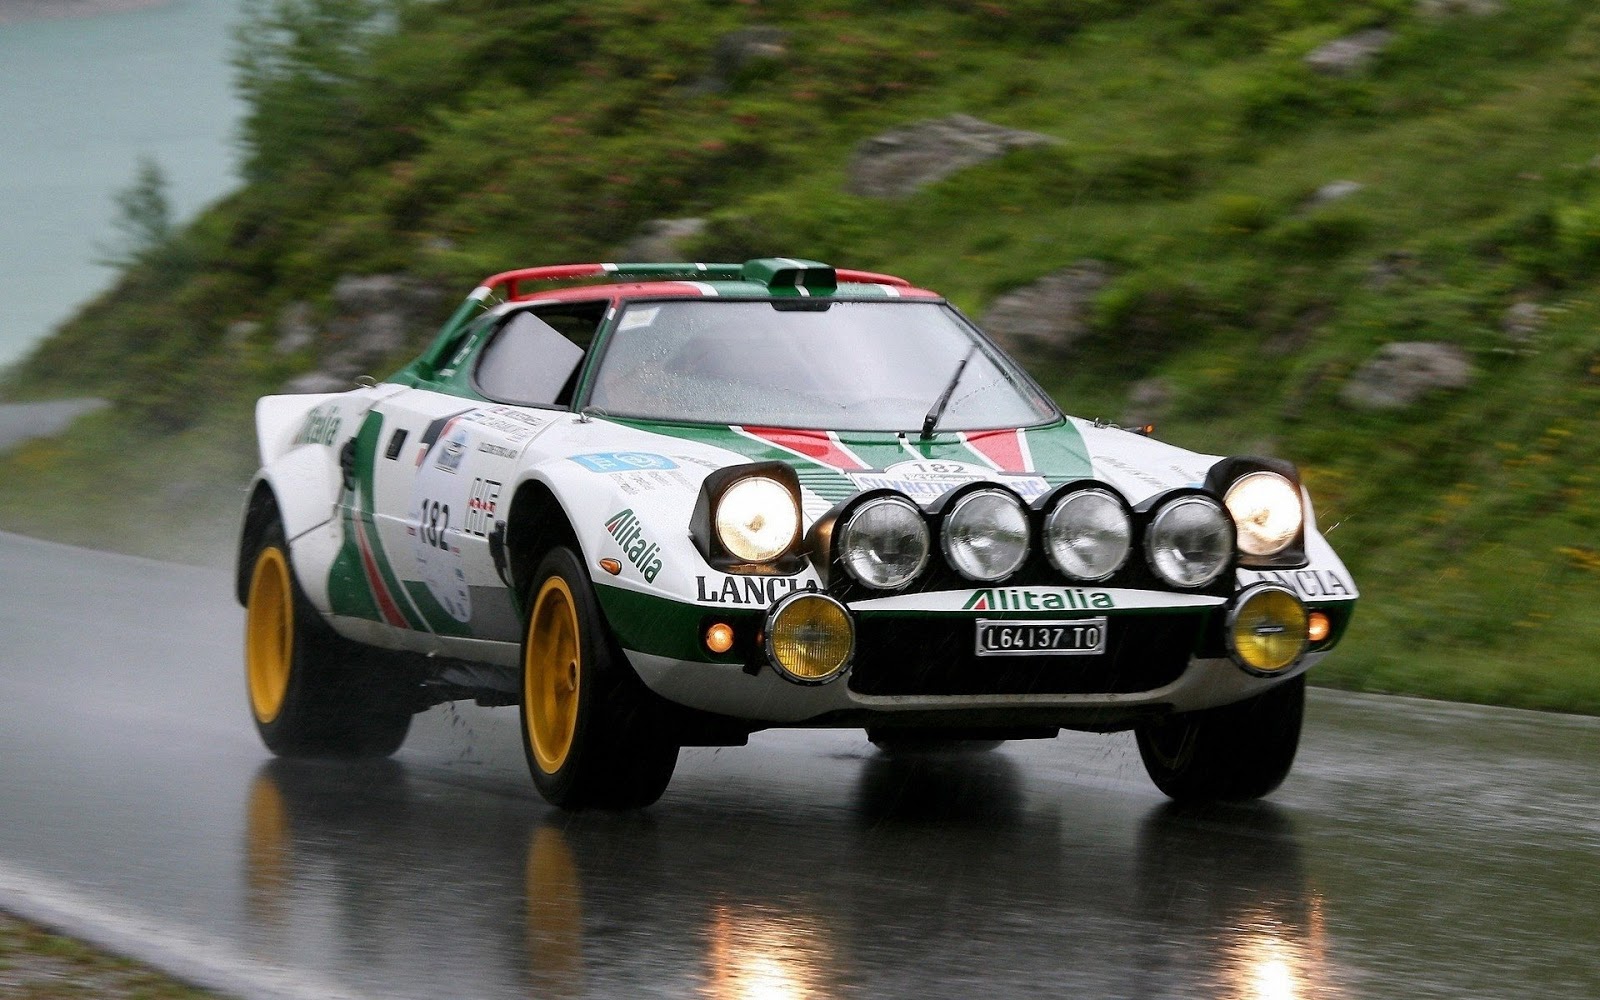
With the making of the rims and tires for the Lancia as with all of the vehicles that I have modeled I find this the most enjoyable to try and create.  The wheels really bring the car to life.  The rims that you see here are as precise as I could make to copy the reference drawings that I found online. I have showed the model to several friends of mine over the past few days and everyone says that my images look like photographs of the real car.  High praise for a Blender modeler like me.

There is a lot of detail in the tires and I was lucky enough to find an add-on for Blender from a site named Blender Market.com. that was exactly what I needed.  On this site there are hundreds of add-on's that either simplify processes to make things using Blender to having files that will add finished models to add to your creations again to save a lot of work.  This was the case for me in finding tires that fit the bill.  I was able to add tires in minutes rather than struggle for an hour or more just to create something that may or may not be exactly what I wanted in the first place.  

The rims on the other hand I wanted to be exactly what was on the car.  Not an easy task but I think I have them very well dialed in for this car. Not sure how many hours I have spent in just creating the rims. But it's a labor or love to be sure.   

So that's about it for today.  I should be able to wrap up this project in the next week or so (hopefully).  Once I get the Lancia all put together to my liking I will post the final images to let you see how it all turned out.  Also for those of you who are also into creating things using Blender 3D here is the link to the Blender Market site. Well worth your time to check out.


Have a good day on your latest Blender project!

Tuesday, November 21, 2017

Lancia Stratos Blender 3D Project Pt. 3

This week I am happy to report that I have managed to get my Lancia Stratos Blender model body pretty well dialed in.  At least I think so anyway.  I could be wrong as I usually am when I model something like a vehicle.  But at this point I think I am on track. 


I came across several things with my model that I needed to correct after pouring over the reference photos that I had collected.  One of the big things was wrong was the top edge of the body where the side meets the front hood and rear trunk surfaces.  On my first attempt this edge simply was not there.  It was more rounded and did not have this distinctive edge. I had to do some major reconstruction to get this edge that flows from the front to the rear of the car. But with a bunch of tweaking I managed to get it where I wanted it for the images that you see here. 


In the image of the rear of the car that is shown above I ran into another snag that kind of threw me for a couple of hours.  I wanted to put in the circular housings that you see in the image for the rear tail lights. When I modeled them all seemed in order until I rotated the model in Blender and then they disappeared. I rotated the model back again to it's original view where I started and the housing reappeared!  I guess I rotated that view at least a half dozen times and so I thought just blow the housings away and start again.  I did that and ended up with the same results.  Depressing to say the least.

After that I left it sit for a couple of hours as it was driving me nuts by this time and at this point I did not want to start over from scratch. I thought about it for a while and came to conclusion that I had something set in Blender wrong that caused the problem.  Sure enough this was the case.  I had a setting in the display window menu for X-Ray that was checked.  I unchecked the selection and low and behold everything was back to normal!  Blender can do that to you once in a while and even though I have 15 years experience with the software it still happens to me on occasion.  So I am happy with the body of the Lancia so far and look forward to start work on the wheels next.

I also have to figure out what I want to do with the car once it is completed.  Most of my vehicle models are just the cars or trucks by themselves.  I will have to work on some kind of setting for this car and another one or two that I have on file.  Something else to think about to complete the model. 

Anyway I'll keep you posted with my progress in the coming weeks and have a good day with your latest Blender project too!

Thursday, November 16, 2017

Lancia Stratos Blender 3D Project Pt. 2

With some nice quite time today I was able to make very good progress on my Lancia Stratos Blender 3D project.  This is a challenging vehicle to model and I still have some tweaks to make on the body as you will see in this post today. 


(Click on the pictures for a larger view)

The lines of the body came together pretty well after working with the Blender model you see pictured above for a couple of hours today.  I like the door seam and the beltline(?) that runs along the body across the door and the rear panel just behind it. As usual with my vehicle Blender creations I collect a lot of photos from the Internet to use as reference material. 

I have found with this vehicle that some of the reference photos are not of a real car but are of toy models of this car.  This is very evident when I find a wiper blade in the photo that looks to be as big as my arm compared to the rest of the vehicle.  With finding this type of photo I immediately dismiss it's accuracy as I want my Blender model to be as close to the real thing as possible.  Needless to say I take a very close look at the little details in my reference photos to get my Blender model where I want it to be.


With the view  shown above I was happy to see the reflections of the door and the rest of the body match up very well.  It will be interesting to see the windshield in place to fill the void that is now in the body shell at the front of the model.  What really brings the car together is the wheels but at this point I have some ways to go before I can get to modeling them.  I just will have to keep plugging along with my efforts and check and recheck my reference photos until I am happy with the finished body. 

One big fun puzzle just like all the rest of the vehicles I have created so it is a good thing to work on when the weather outside is far from ideal to do anything else. Hopefully I can finish at least the body work by the end of the weekend.  I'll keep you posted as I move forward with this fun project to let you see my progression in it's modeling.  Enjoy the pictures.

Wednesday, November 15, 2017

Becca's Bathtub Project

The last couple of weeks have been nothing but run, run, run.  I am sure all of you have had weeks like this but with my running I have gained new friends that have wanted my assistance in helping them with their projects. As many of you already know I am helping out at a new makerspace in Dubuque Iowa named the Key City Creative Center.  Along with my helping with projects I have been teaching computer aided design, fiberglass class and soon will be teaching CNC machining. On top of all of this I am on the board of directors for the center.  


So that brings you up to date on just the background of my post today.  Now on to what the heck is "Becca's Bathtub"?  Becca Kacanda is a very nice lady who is a member of the makerspace and that I have been getting to know and help with her very interesting project.  Becca is an artist in her own right who has been given a grant to created a piece of artwork for a showing some time next year.  Her original work involved a very heavy cast iron bathtub. She had taken the old tub and cut it in half and then decorated with various bits and pieces of varying materials to create interesting designs on the tub. Everything from pennies to broken mirrors. Even with the tub cut in half it takes three men and a monkey in order to move the completed artwork even just across a room.  (By the way the monkey is needed to give directions.)  

Anyway Becca had taken my fiberglass class that I teach at the makerspace and I suggested to her to make the new piece of artwork out of fiberglass instead of having to deal with the old cast iron tub.  She thought the idea would be perfect for the project and so I have been helping her with the design and construction of the new tub or should I say enclosure now.  The enclosure for a lack of a better terms for this form will be made of a foam and fiberglass composite construction and when completed Becca will be able to easily pick it up one handed!  Plus the fact that the new tub will not have to look like an old converted cast iron bath tub when it is completed. 


I had worked out several different designs for Becca and she settled on a more modern shape to get things started.  


I worked out the design for the new enclosure using Fusion 360 cad software.  As I said earlier in this post the construction will be a foam a fiberglass composite which makes things quite simple to build.  In the image above you can see the layout of all of the pieces along with a temporary stand to hold all of the ribs in their correct locations while the structure is being built. 


I colored all of the various pieces of the framework differently in the images above just to show where everything goes when construction begins.  This helped Becca and I keep things in order while we were putting it all together.  The extrusions on the back of the enclosure will be cut off before the outside of the structure has been covered with Styrofoam strips.


Here's Becca fitting up the Styrofoam strips for the interior of the structure.  She and I had spent five hours tracing out the templates for the parts on to a 4 X 8 sheet of Styrofoam and cutting all of the pieces out the day before.  After this was done all the parts had to be hot glued together to make the shape that she had decided on for the project. As you can see the shape is coming together nicely.


The foam strips that we cut from our Styrofoam are 1/4" thick, 1" wide and 4' long.  Becca is taking each strip at this point and cutting them to length, sanding the edges smooth and test fitting them so that they can be hot glued into the interior of the enclosure.


Lot of cutting and trimming needs to be done to complete this project.  Becca's is still wrapped up to stay warm as the shop had not been warmed up yet when she started working the night I took these photos. 


The strips of foam are hot glued in place and each need to be hand fitted to cover the interior of the ribs for the new enclosure.  With each piece that is added the structure gets stiffer and stiffer which is a good thing but over all it is still quite fragile.  Once we get into laying in the fiberglass to cover the structure inside and out it will be well protected, strong and very light weight.  The new structure will be a custom design and be light enough to easily be moved from one place to the next. 

As Becca's Tub project progresses I will shoot photos to show you how it all goes together along with the details of what Becca has planned for it's final artistic look.  I'm sure it will be quite interesting to see the end result when she is done with the project. 

Tuesday, November 14, 2017

Lancia Stratos Blender 3D Project

As with most of my Blender 3D projects I usually get into creating something new while waiting for parts for another project to arrive by mail or for assemblies to dry during a project that is in the workshop.  This once again is the case with another very sexy looking car named the Lancia Stratos HF that I have already started work on.


The Lancia Stratos HF, widely and more simply known as Lancia Stratos, is a sports car sports and  rally car made by Italian car manufacturer Lancia. The HF stands for High Fidelity. It was a very successful rally car, winning the World Rally Championship in 1974, 1975 and 1976.


Only 492 cars were ever produced but in later years after production ceased various manufacturers of kit cars made copies of it for guys like me.  Not that I still would turn down the opportunity of owning an original one or at least a replica of one.  So this is my current Blender endeavor.


With all of the vehicles that I model in Blender one of the first steps other than tracking down good images of the actual vehicle is to set up the layout that you see pictured above in Blender.  This layout consists of a side view, top view, front and back views of the vehicle.  To get these views I go to Google and search under car blueprints.  There are several sites that have free blueprints so I was lucky enough to find the Stratos in one of the them. I set up the images in Blender as shown above to line up and scale each of them together to get the right proportions in making the Blender model.


Shown above is the front of my Blender Lancia model.  Already it is taking shape pretty well and I'm happy with my efforts.  I usually start with the more difficult sections of a vehicle to get them out of the way and the front end didn't end up being as hard as I thought it would be so that is always good. This Blender project should be another challenge as usual but a fun challenge.

That's about it for today.  I will keep progressing on this project and keep you up to date on this and other projects that are in the works once I start getting parts made, painted, or just plan planned out.  Have a good day in your shop as well.

Thursday, November 2, 2017

The Scrooch Gun Project Is Born!

My latest idea for a project actually goes back to my childhood and a TV show called the Rocky and Bullwinkle Show.  On the show were various characters that I enjoyed as a kid and even more so when I became an adult as there was a lot of adult humor in the show that I never understood as a kid.  In the show there were two little characters named Gidney and Cloyd.  These guys were two little green moon men.  One of the interesting things that these characters had with them to protect themselves was a gun called a Scrooch gun.  When fired it would make the bad guy freeze until he was shot again with it to unfreeze him.  So the idea of making my version of a Scrooch gun was born one morning while I was shaving and looking at my can of shaving cream.  


Here is a good image that I created of my Scrooch gun design.  I modeled this in Fusion 360 CAD software and have all of the components figured out on how to make it.  The yellow canister with the name on the side is actually an empty can of shaving cream.  Thus the reason why this project popped into my head while shaving.  The can had the perfect shape for this 50's style  SciFi gun so I started working out the rest of the design over the past couple of days.  The clear dome shape for the muzzle of the gun I have sitting on my desk as I write this.  I made it by cutting down half of a plastic sphere that is used for Christmas ornaments.  Next the red tinted disks I plan on cutting on a lazer cutter at the makerspace I teach at in the next couple of weeks.  This will give me time to get the materials together for the disks. The remainder of the gun will be 3D printed in my shop and various bits of hardware will need to be collected to put it all together.  


If the gun turns out as well as I suspect I plan on making a couple more designs to be mounted in a display case.  All of the components for the Scrooch gun are held together with a 10" long threaded rod that runs through the center of the toy.  The pistol grip and trigger are bolted into place to the lower mounting just below the yellow cylinder. I think it will be an interesting project that will be fun to make and display. 

I just could not resist posting the image above that I tracked down online of Gidney and Cloyd from the Rocky and Bullwinkle show.  Here they are standing on the moon with their Scrooch gun in hand.  My version is a lot more elaborate then theirs but my version is at least 55 or 60 years newer than theirs.  Anyway I think this will be a fun project to play around with.  I will post more about the Scrooch gun once I get all of the parts gathered together and can show you the entire process of how I assemble it.

If you have never seen the Rocky and Bullwinkle show track it down online as I am sure you will get to see these little characters and get a laugh or two when cartoon were made during a simpler time.