
This week brings another round of great progress to the Ridekick power trailer project. I wanted to get this out a couple of days ago but with the project moving forward more rapidly than I expected I wanted to press on and see what I could get done. So I thought it best to get this out before the postings either get to far apart in time or the project is completed all together. So let me show you where the project is at now.


Here the fenders for the trailer are set up to mark the mounting locations for the small 3D printed mounting spacers that go between the fenders and the lid of the trailer.

I taped three small foam spacers to each tire so that I could locate the fenders correctly and line up the fender spacers on the lid. At this point all I needed to do was slip the fender over these spacers and measure the distance from my work table to the rear bottom edge of the fender. This worked out to be exactly 6 inches. So it was an easy task to get the fenders matched up perfectly.

I took a Sharpie and marked where the spacer mount touched the lid of the trailer. The center mark on the spacer was matched to the center line of the tracing and the outer perimeter of the part.

To hold everything in place I used a couple of clamps to hold the spacer securely while I drilled the holes for the 1/4" bolts. I drilled the center hole first then slid a bolt through the hole. Then I double checked my alignment with my marks and drilled the second hole and so on until the job was done.

I then mounted the spacer and fender to the lid using one inch long 1/4-20 bolts, nuts and large fender washers on the inside. This secured everything nicely and still gives the interior of the trailer a nice finished look.

I was amazed how well everything fit and looked at this point. This picture was shot just after I mounted the parts on to the lid. Sanding will come next to smooth things out and get a nice finished look for painting.


With the fenders securely in place I was then able to check the alignment and operation of the fenders on the lid. The fenders do look a bit strange being mounted to the lid with it's open but it was the simplest way to put fenders on to the trailer without having to jump through flaming hoops to get to the job done.


The real point of the project was to get functional fenders that actually looked good when the trailer is rolling down the road. So I could care less as to what the fenders look like when the lid is open just as long as the design and function turns out the way I planned I'm happy.


Next comes the custom rear reflectors that I created for the trailer. I had been trying to find some small reflectors but the ones that I had came across were much to large to use with the small fenders. So I designed these after finding the small orange and red oblong reflector inserts that you see here. I really like the look and they will fit in nicely with the fenders once I get the mounts painted to match the fenders.

I could not resist showing you the fenders at this point in the painting process. Here they are in primer after I spent a couple hours sanding them smooth for paint. Already they are pretty impressive looking. To say I am tickled pink at this point is an understatement for sure. I did more prep work on the fenders today and am very close to spraying paint on the parts. Very close.

I wanted to show you this photo of the front of the trailer so you know what I am talking about when it comes to painting it. The lower portion of the trailer body which I call the tub I wanted to paint black instead of the tan color that you see here. I was able to easily remove the tub from the trailer so that I could prep it for paint.
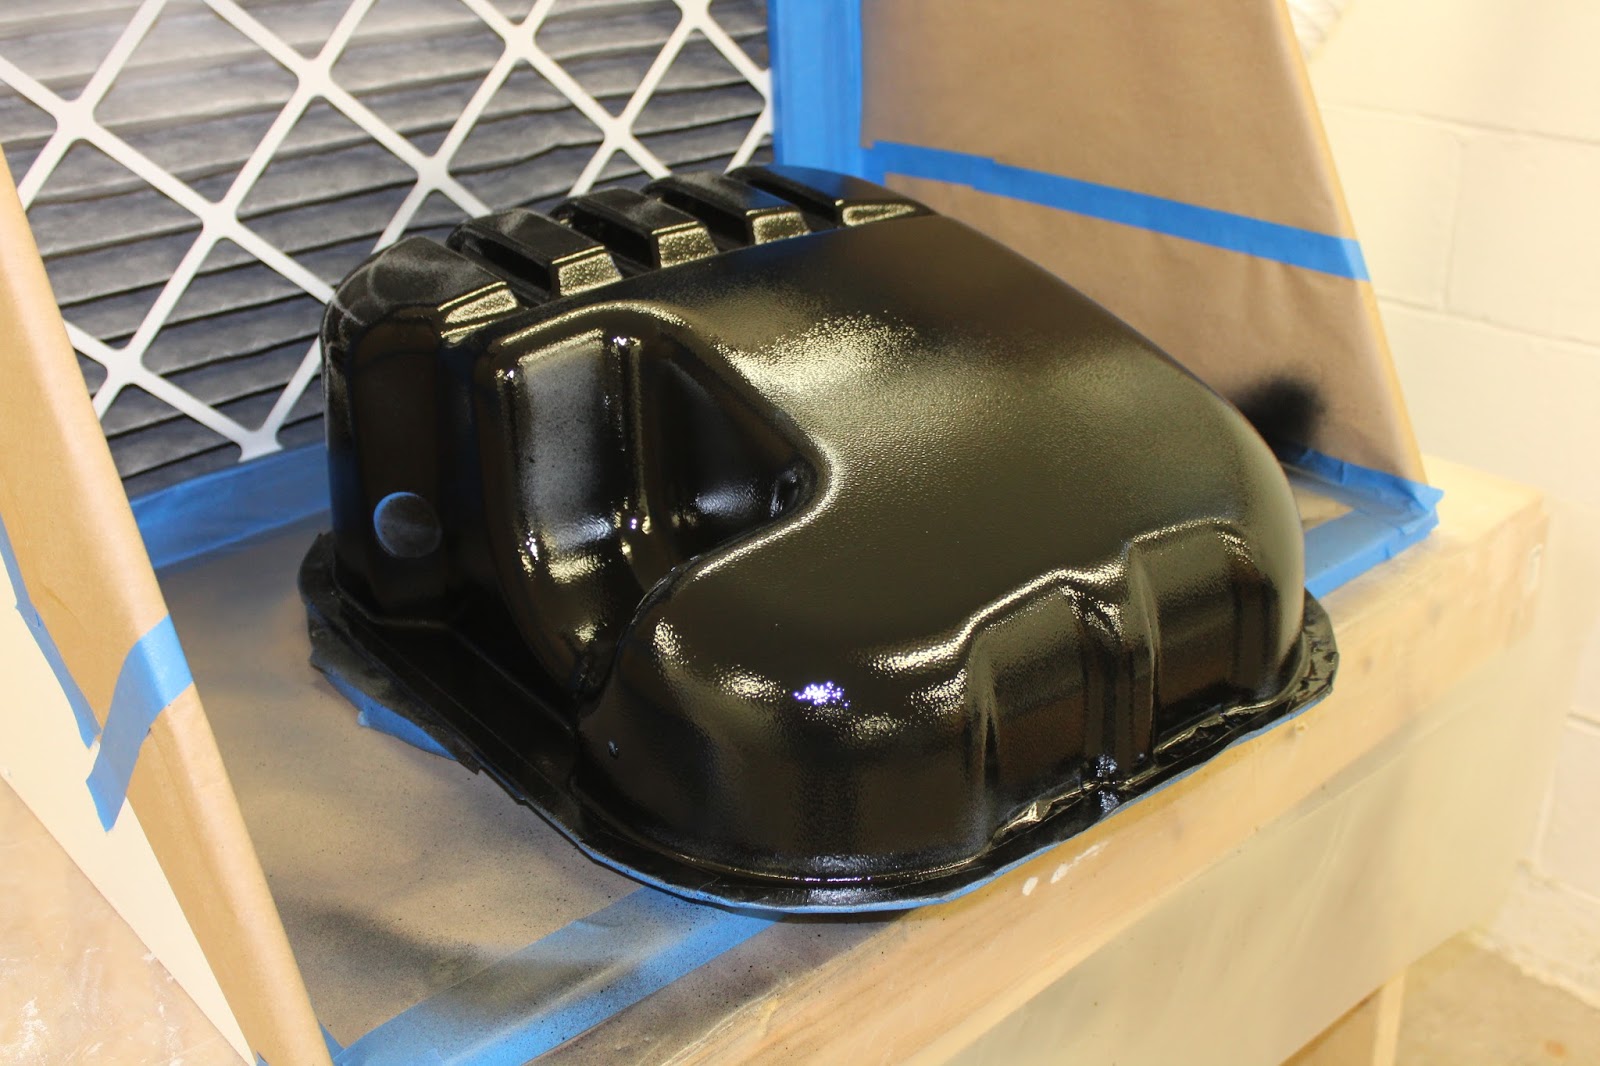
Here is what the tub looked like when it was sitting in my little table top spray booth. I was lucky enough to have the part fit so that I could spin it around to get the painting done and have it turn out as well as it did. I like the nice glossy finish. Another job well done.


With the tub painted and dry it was an easy task to reinstall it back into the trailer. The look of the tub being painted gloss black really improves the look of the trailer a great deal. I am looking forward to having the lid of the trailer painted and remounted to get the full effect. The lid will be painted red with white graphics. The graphics I have planned for the trailer I will make on my vinyl cutter so hopefully I can get this all accomplished in the next week or so. Just will have to see if I can make as much progress with the project as I have in the past couple of weeks. I will have to take my time with it all and hope for the best. Stay tuned for further progress. Have a good day in your shop!
Awesome job as always. Really like the way the reflectors fit on the fender.
ReplyDeleteDid you 3d print the reflector housing?
Thanks for the nice comments about my latest project. You are correct the reflector housings I designed using Fusion 360 CAD software and made on my 3D printer.
DeleteVery nice but where did you get the fenders?
ReplyDeleteHello Ralph,
DeleteI designed and built the fenders myself. That is what this project was all about. Nothing like this had ever been made for the Ridekick trailer. I spoke with the designer and owner of the company when I purchased the trailer and he said that the fenders I produced looked great but he never got around to adding them to his product line when he designed the trailer. Anyway the project is documented fully on my site here. Go to the August 2017 directory on the opening blog page. It's located on the right side of the first screen you will see when you open up my blogs. In the August of 2017 listing you will find the posts that I did on this project complete with photos and descriptions of how I made the fenders out of fiberglass.