
For some time now I have been wanting a boom box. I thought it would be great to be able to play some tunes in the driveway while I have to wash the car, rake leaves, or any other outdoor chore that needed some music just to make the task just a bit more tolerable. Most of the boom boxes that I have seen online that different people build gave me the inspiration to try my hand at building this rather simple project.
I liked the idea of using a 50 caliber ammunition box but not sure if I wanted the size or the weight when the project was completed. With this in mind I started looking for something that could be made into a boom box but would be made out of plastic to make it lighter and smaller for the same reason. I lucked out about a week ago when I came across this box at my local home and builders store.

This little ammunition box look alike was the perfect fit for this project. It is smaller (11.5" X 5" x 7") and plastic so it's made to order. A metal ammunition box is 12" x 6" x 7.5" in size. With the box found I next needed to see if all of the components that would be in the box would even fit. I tracked down the dimensions for the speakers and the amplifier and laid it all out in my design software on my PC. After a couple of days I had the answers to my questions which looked good so I started ordering parts.

Once the parts had arrived in the mail I started construction. Or should I say destruction. For this first step I measured the openings needed for the two 3" speakers and marked them out on to one of the side of the box. I then carefully drilled a lot of little holes inside the marked circles to make my cutouts.

With the little holes drilled I was able to make small cuts using a utility knife to join all the hole to remove the inner pieces as shown above. Being plastic this made the task rather easy compared to what it would have been like if this box was made of metal.

With both holes cut out for the speakers I then took a Dremel tool with a sanding drum bit on it and smoothed out the openings. The photo above shows the two holes one before sanding and the other after. It was another easy task to complete.
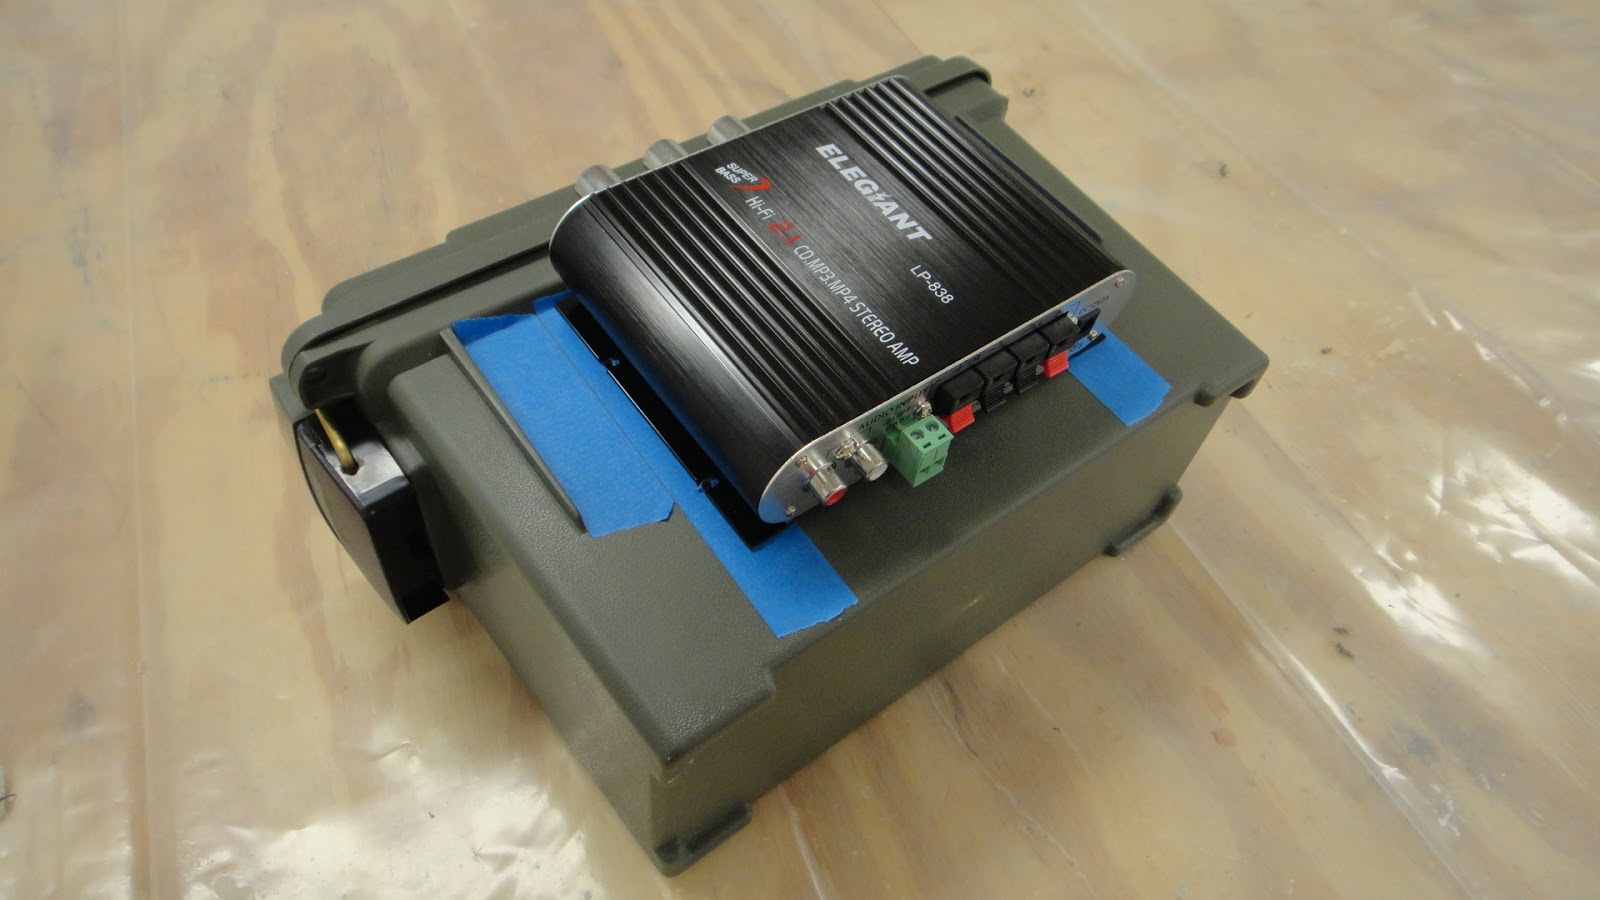
Next I had to figure out how to get the holes drilled to mount the little amplifier. I took painters tape and laid it down on the opposite side of the box where I had cut out the holes for the speakers. Then I put the amplifier on top of the box as shown above and traced out the hole locations for the amp on to the tape.

Once the tape had been marked I simply had to drill through the box at the four locations to be able to secure the amp on the inside.

The next step was cutting a hole for the PC power port where the power cord for the boom box would be mounted. In the photo above I have the power port facing down next to a rectangle of drilled holes once again. Same as before, it was a simple task of measuring and marking on the painters tape where to drill and cut for the opening. This opening being on one end of the box near the base.


The two photos above show the cleaned up opening for the power port along with the mounting holes and the power port inserted into this opening. A nice clean installation that was rather simple once again to accomplish. At this point I was even more happy that I had used a plastic box instead of a metal one.

With the holes cut into the box I started work on the guards for the speakers. The photo above shows the new guards for the 3" speakers that I designed and 3D printed. This only took a few hours to get the bugs worked out of the design and printed so that everything fit right and the look was clean and simple.

With the guards ready to go I was able to easily install the new speakers into the box. I like the look and placement of the speakers and if anything should happened to one or both of the guards it will be an easy task to 3D print new ones. I highly doubt this would need to be done as the guards seem to be well designed and have good strength to them.

Here is what the speakers look like inside the box. The only difficulty I had was getting at the lower bolts to attach the mounting nuts. The space was just big enough for me to get my hands into the area to complete the task. I put Lock-Tite on the mountings just for good measure.

Next I installed the power supply for the amplifier and soldered the wiring to the PC power port. Once the wiring was secure I mounted the power port to the box using a couple 6-32 machine screws and nuts. Again at this point the space is getting filled up so I had to be a bit more creative in figuring out how to tighten the power port into place. I took me a while but I managed.

The last piece of hardware that needed to be installed was the amplifier itself. I slide the amp into place after installing the speaker wires and power connections. This was the easy part of this portion of the build but when it came time to actually mount the amplifier now my space at the bottom two mounting points was practically none existent. I mounted the top to bolts and nuts easily. The bottom two bolts would go in no problem but I could not get my hands into the box to place the nuts on the inside of the bolts. I finally got it figured out when I tracked down a long needle nose pliers that I had in the shop. With the dexterity of a surgeon I was able to get each of the lower nuts onto the mounts using these pliers. Not saying it was easy but I got it after some fancy handling on my part.

I didn't want the box to be totally open to the components while I am using it so I figured out a nice way to finish the inside and not have to jump through hoops to get there. In the photo above are two pieces for the interior of the box. The top piece is gray foam rubber and the bottom pieces is small plastic panel cut to fit the interior of the box.

I covered the plastic panel with a carbon fiber wrap material and then used contact cement to join this panel to the foam piece.

With the box being tapered it was a simple matter of sliding the carbon fiber interior panel into place and pushing it down into the box until the foam compressed to make a nice firm fit. It looks great and it easily removed if I ever need to fix something inside the boom box.
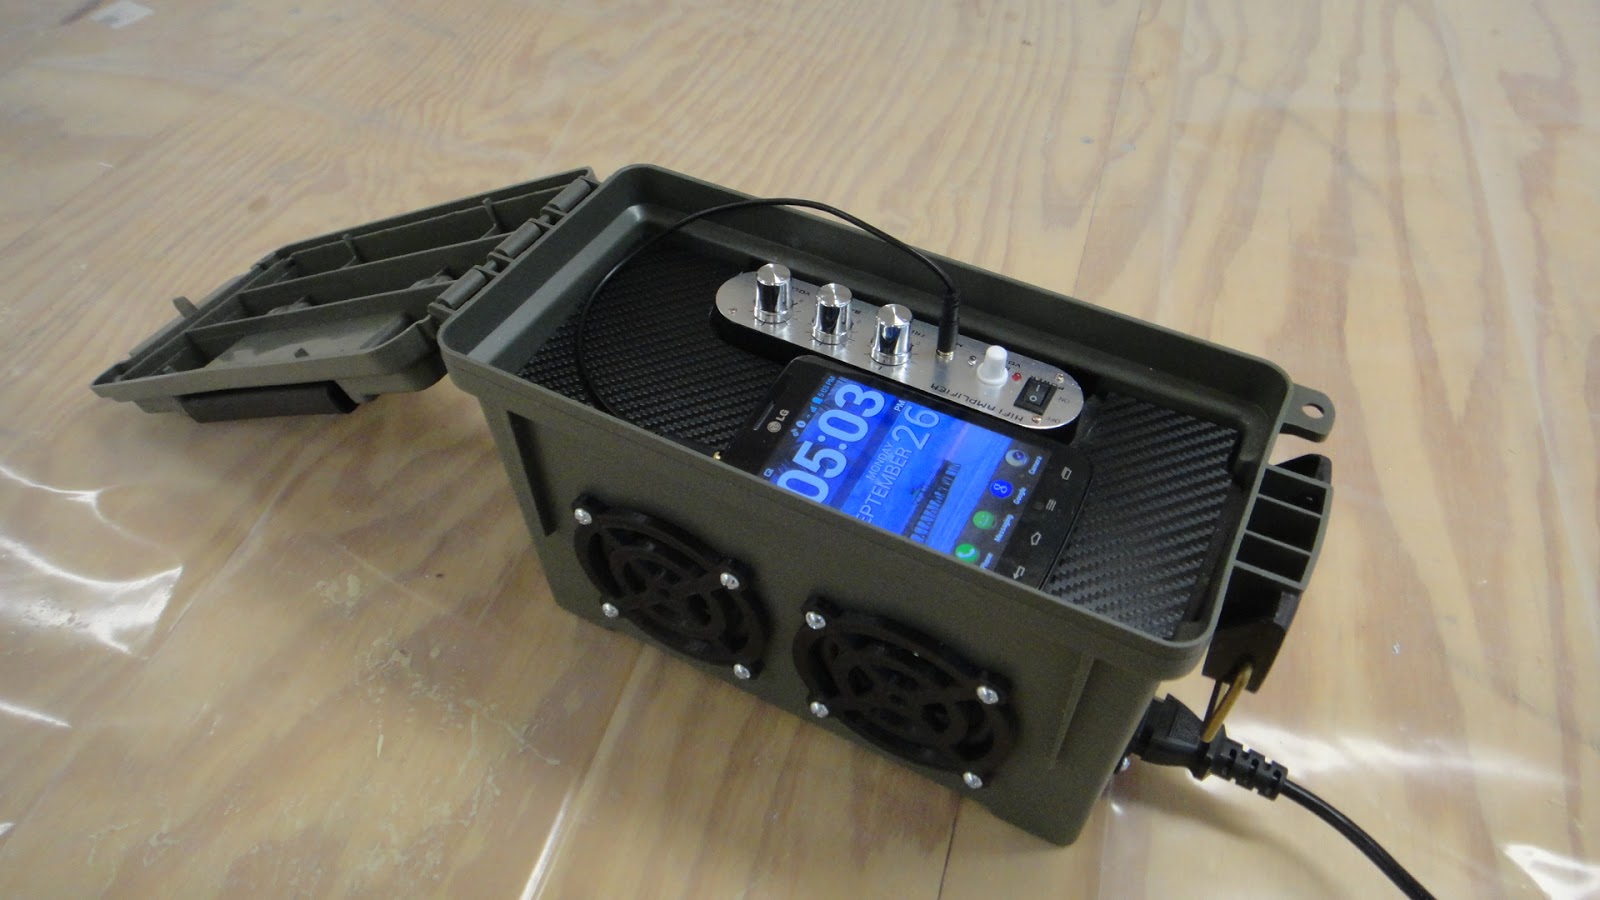
With the boom box completed it is a simple task to plug in my phone to the amplifier and external power to an outlet and now I have "Tunes" that I can listen to while doing my chores.

When I am not using the boom box the power cord easily unplugs and can be stored inside the enclosure with the lid securely latched closed.

My little boom box should last me a good long time and was a fast and easy project to complete. The sound it good for the little three inch speakers and much louder than I ever could get by just using my phone. I like these smaller projects that come together quicker than I had hoped. Makes for a great day in the shop. So that's my design. I hope you like it and have gotten inspired to build your own boom box for your outdoor enjoyment. One last thing. The little boom box weighs just short of 4 pounds... (3 pounds, 13.9 ounces). Pretty good I think. Again the metal box would add a bunch more weight to the project to get the same result. Enjoy the images and I'll enjoy this project.


