Monday, August 31, 2015

Free Fusion 360 CAD Design Software From Autodesk!

It has been some time since I have been online looking for new CAD software.  The software that I currently use will some day no longer work with my computer system.  Case in point when it comes to the new version of Windows 10.  Not sure when I will upgrade to this version due to my concerns with using my CAD software so I was pleasantly surprised to find free software from Autodesk once again over the past couple of days.

Autodesk's CAD software is called Fusion 360 and is free!  It has been out for a couple of years now. Not finding it until now may not be unfortunate as with all software it takes time to get the bugs out of any of it.  I have used Autodesk Inventor for a few years and it no longer works on my main computer system.  Fusion 360 is very similar to Inventor with the look and feel  of the user interface.

 
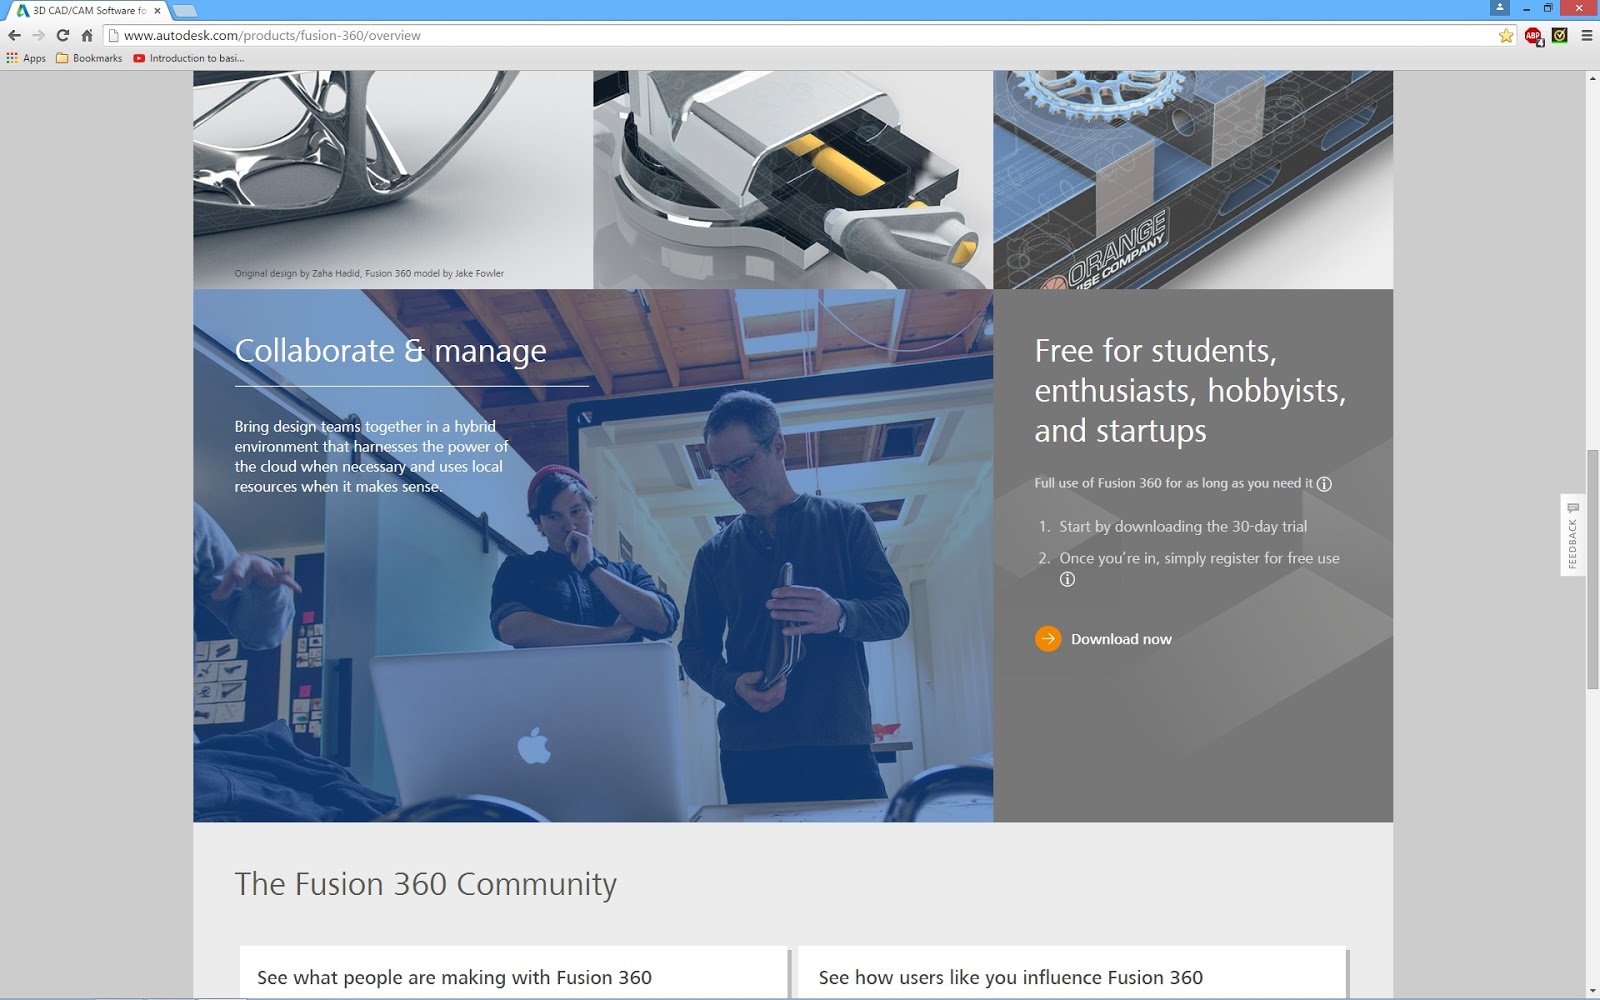
 Here's a screen shot on the Autodesk Fusion 360 website.  The software is free from students, enthusiasts, hobbyists, and startups!  Sounded good to me so I clicked the "I" symbol  in the text and was shown the next pop up window.


The pop up window reads " Access the same design software used by industry leaders worldwide.  A free 3-year license is available for students, teachers, and academic institutions.  A free 1-year start up license is also available for hobbyists, enthusiasts, makers, and emerging businesses that make less than US$100,000 in revenue per year.  At the end of 1 year, you can reselect the start up entitlement or transition to a commercial entitlement. "  How can you lose?  Free software for a year and then you can just renew it and use it again.  I was sold so I downloaded it.


In the software there are tutorials to get you started designing whatever you have in mind.  This little desk lamp was the first training exercise and are the actual images of what I put together.  The images were created within the Fusion 360 software. Looks just as good as the Blender 3D software that I use for my graphics projects.
 
 
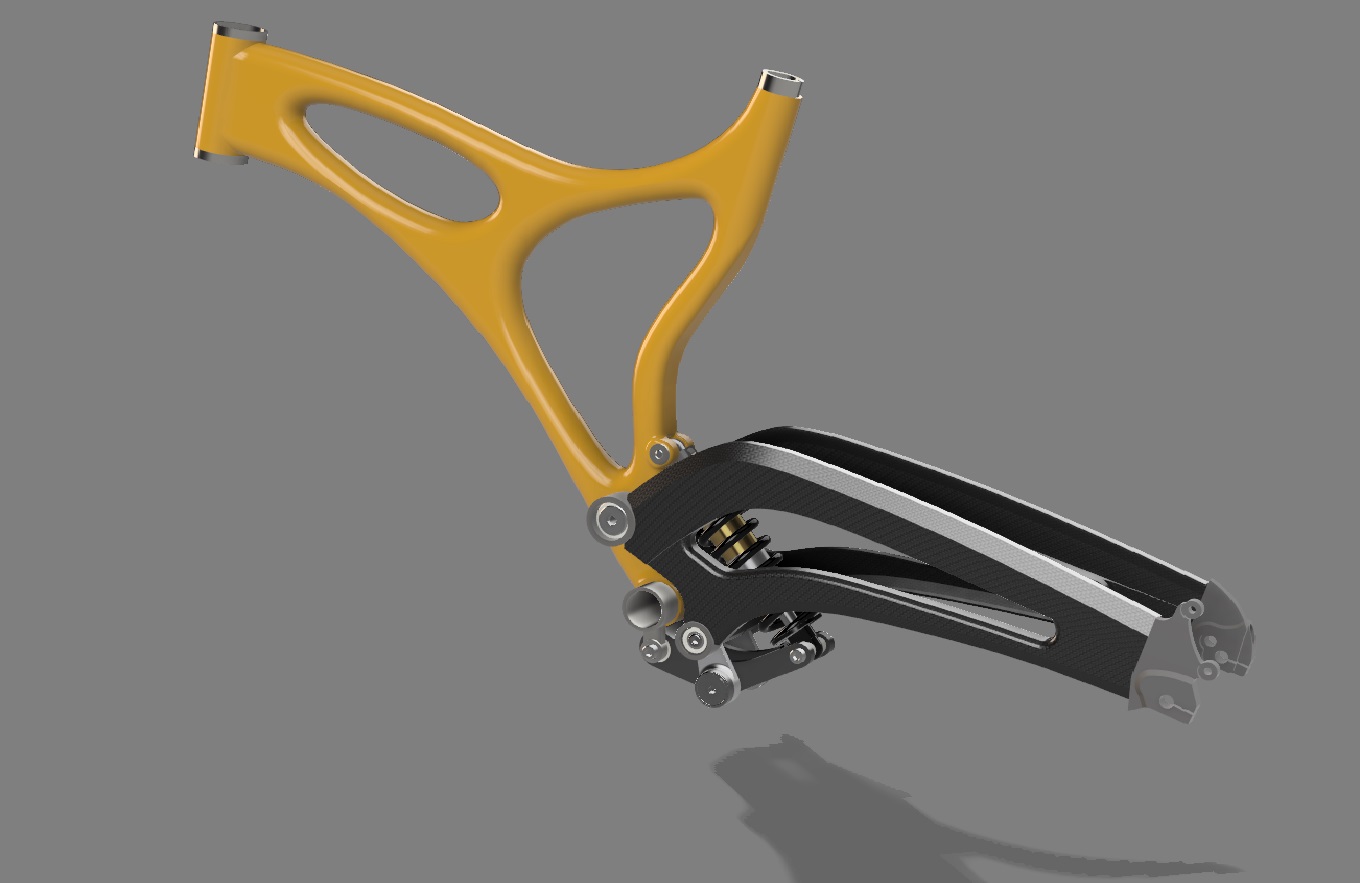
The image here of the bicycle frame again is part of the training that is included in Fusion 360.  So far I am very impressed with what I've found in the software and the capabilities that it has.  I need software that has the tools I need to create the projects that you've seen on my blog here.  I wanted to know if this software was capable of creating drawings as well as STL files for 3D printing.  The answer to my questions were a big "Yes"!  It also can set up CNC milling for my CNC machine.  Lots of possibilities with Fusion 360.


The modeling in the user interface as you can see is very detailed which makes it even more inviting to use. 

 
This radial engine was modeled in Fusion 360 by one of it's users.  An amazing piece of work to say the least.


Another finely detailed piece of work here with the details that are in this shaver. 
 
I did more digging into information about Fusion 360 and being that it has been available for the past couple of years there is a large community of users and tutorials available. So should I need questions answered concerning the use of the software it should not be a problem.


The Fusion 360 user interface is very well laid out with either online or off line use available.  With using the software online your design files are stored in the Cloud.  This makes it possible to go online anywhere in the world to work on and share your design with anyone.
  I want to go through the rest of the training to learn more about Fusion 360 and how it all works.  So far it is looking very good and may be my next standard software for creating future projects.
 
To learn more about Autodesk Fusion 360 and how to download a free copy here's the link to their website.


Monday, August 24, 2015

Blender 3D VW Bus Project Part 7

The post I have today brings some nice additions to the VW bus project.  After eight hours of modeling I've been able to complete the front and rear bumpers, refinements to the convertible sun roof, rear tail lights, rear license plate, and minor tweaks here and there along the way to improve various alignment of previously modeled parts. 


I was happy that I took the time to collect all of the reference photos for this project.  I had to double check several photos to get the trim figured out for the front and rear bumpers along with the piece of trim shown in this photo that is below the rear passenger doors.  I also refined the rear view mirrors a bit to get the stem for the mirror to be a bit more correct. 
   I also removed the indentation for the wiper blades that I had previously modeled just below the windshields.  The wiper blades will be next on my to do list in the coming week or so.  This will be a fairly easy task to create them as once I get one modeled I will just duplicate another one and place it in the model.  I had to figure out also how the wiper blades are placed on the bus if the front windows are open.  What is done I found out is to have the wiper blades cross one another like you would fold your arms. A simple thing to model so it will be an easy task to complete.


The rear of the bus was interesting as well to model and find the photos I needed for the parts you see in the image above.  I managed to track down the correct font for the Volkswagen name plate that is on the rear door of the bus along with a photo of the "T" handle to open it.  
  The tail lights were simple enough to model as they are just an elongated circle with a chrome piece surrounding the light.  The lights also have a small rubber gasket that goes between them and the body of the rear of the bus.  The rear bumper is similar to the front but without the center bumper over-rider tube so that the rear engine cover can be opened up. I originally had it modeled with this center tube in place and thought it was kind of strange that it would be this way and again with my reference photos I was able to correct this before I completed the model. 


The front chrome and black trim on the bumper is very similar to the chrome and black trim that is on the body.  It is only a little different in shape and size.  I was going to add a front license plate but I think I will leave the model the way it is as I like the nice clean look of the bus without the plate covering up a good portion of the front end. 


In this upper shot of the bus you can see plainly that the interior needs to be put into the model.  So it will be added as planned in the coming weeks.  For now the exterior is nearly complete with what I've shown you today. 
   I was really happy to get the top vinyl folded cover for the sun roof tweaked a bit more.  It looks a more realistic now with the folds in the top coming together a bit more believably.  So I am constantly looking the model over again and again as I work on it at all kinds of different angles.  This helps me get a more detailed model in the end as I pick it apart and refine it when I see something I don't particularly like.  
  With the additions I've mentioned here the hours have stacked up pretty well with all the work I've added to the bus.  Eight more hours to be exact.  So the total now for the model has come up to 49.5 hours total.  I will be pretty accurate in saying that the completed model will be close to 100 hours time to complete. Another interesting fact of my bus is that at this point there are 179 individual parts in the model. This does not include parts that are mirrored in the model.  Lots of parts to be sure but every little piece adds to the detail in the model.  I'm again pleased with my efforts so far.  I hope you agree and enjoy the images.  More posts on this project will be in the works. 

Wednesday, August 19, 2015

Blender 3D VW Bus Project Part 6

Today's progress on the VW bus project has taken a good portion of the day to complete.  New headlights, signal lights, mirrors, and door handles have now been added to the model. The headlights and signal lights took the most amount of time to get this detail correctly modeled.  I'm still fussing with the lighting as you can see from these few images just to get some more ideas for the final renders that I want.


The headlights took several tries in order to get the right look that I was going for.  I was happy to have collected all of the reference photos so this helped out quite a bit in getting it all worked out.


I am quite happy with the detail of the signal lights and even the housings for the headlights.  The chrome rings around these lights show up nice and bright to finish off the front of the bus perfectly. I also had to add chrome rings around the inner mounted headlights to get the right look to match the real thing. 


I am looking forward to adding the bumpers to the bus which will give the bus a bit more bright work to the model.  The mirrors and door handles add a bit more detail and were not terribly difficult create. The plus side with most of the modeling of the vehicle when it came to these parts was the fact that these parts could be mirrored on the model.  So if I made one side the other side of the vehicle would match perfectly.  This is how the lights on the vehicle were also set up. 


  With all of the detail on the outside of the bus it would be pointless to not finish the model off and do the inside as well.  This was exactly what I did when I created the VW bug Blender model.  It made it much more realistic in the finished images so it's something on my to do list for this model as well.  An additional 6.5 hours have been added to the model build time now which brings the total up to 41.5 hours.   I'll post the next installment as soon as possible.  Enjoy the updated images.

Monday, August 17, 2015

Blender 3D VW Bus Project Part 5

Today's installment of the Blender 3D VW Bus project has taken me a bit longer to create.  As usual with trying something new it takes a while to figure out just exactly what you need to do in Blender to get the end result that you planned on in the first place. This has been the case today.  I have accomplished some smaller tasks on the model over the past day or so with modifications once again to the body of the bus to refine it as I tweak it here and there to make it as flawless as possible. (If that is even possible.)  But the big task that I wanted to accomplish was the installation of the vinyl sun top roof.  To make a closed roof seemed easy enough but to have a view of the roof being open was another matter all together. 


Here is how the roof looks closed now that I have it modeled.  It took me a couple of tries to get it the way I wanted and in the end learned a couple of new things along the way.  The ribs in the roof were a simple matter of dividing the roof into sections that matched the blueprint drawings that I started with to create the model in Blender.  


Once I was happy with the look of the top I had to figure out how to open the roof up and have it look the way it does on a real VW bus.  


Here's the reference photo that I needed to show me how the roof should look once it has been opened up. The problem I had with the Blender model was to figure out how to duplicate the roof that was laying flat and then convert it to show what it looked like opened up and folded similar to what you see here.  I took the computer modeled roof and divided it several times at the locations for the ribs  and started moving things around.  These became a jumbled mess of vertices in a big hurry to the point that I didn't know what to choose next to move that would give me the shape I was trying to make.  With a little research online at the Blender 3D  site I found my answer.  
  What I wanted to do was be able to select a single row of vertices in the roof and then make each row an individual group.  With three separate ribs having a group to each segment and eight additional groups for the spaces between each rib I was better able to control the shape of the roof as I adjusted it to get the desired shape I was looking for.  


Here is the final result from my efforts today on the project.  I like the way the roof is opened up now as it is much more believable than when I started on it.  The process of creating vertex groups was something new that I've never used before but will be another handy tool that I will surely use in Blender projects down the line. For detailed  information on how this process is done  here is the link to the Blender site that explains everything in much more detail. 


With the roof opened or closed it is another great detail that will add that much more realism to my Blender model.  The hours are adding up with this segment of the project.  Total now has come up to 35 hours at this point. 

 A lot of the time was spent today just trying to figure out how to do something new which in itself is always a good thing and turned out to be a worth the effort once again.  Enjoy today's images and have a good one on your latest Blender project as well. 

Saturday, August 15, 2015

Blender 3D VW Bus Project Part 4

This installment of the Blender 3D VW Bus project brings the addition of the windows for the vehicle.  With Blender's Cycles render engine the glass sky reflections in the images really shines (no pun intended).  


Taking another four hours to complete this portion of the model it has transformed the vehicle further with the installation of the glass and framing. Since the VW bus has so many windows that are exactly alike it has sped up this process a bit in creating all of the windows and the hardware that goes along with them.  I first started with the black rubber seals that go around the outer perimeter.  I then duplicated the first one and made adjustments as needed for each window opening.  Then came the chrome outer frame for the windows and finally the glass. 


A lot of detail can still be put into the windows as there are no hardware that is normally added to a functional window such as hinges and window locks.  This is obvious on the front opening windshields.  There is a small set of arms that support the tilted windshields when they are open.  I will have to do some more research as to what these arms look like to get it the way I want.  Also the first three windows just to the rear of the driver's door have windows that open as well.  I'll have to look at this and see if I want this to be shown in the model.  Why go through the effort only to find that it is not something that I think will look good in the first place. 


Lots of trim is still missing on the outside of the body at this point. I have to work on the cover for the sun roof, front headlights, bumpers, door handles, hinges and the list goes on from there. Again with the side door on the passenger side I have not decided if I want these doors to be open or stay closed at this point.  I have it modeled so that this option is an easy matter or just rotating the doors open or closed. I will have to look in to this as well.  

Then I'm not even looking at the final lighting and what the rest of the image will look like that does not even relate to the vehicle itself. I know for sure that I want to do something more than have a white flat floor that the bus is parked on.  Just not enough detail for sure. Usually with any model with this much detail in it I will spend hours just working on the lighting to get it the way I want.  I could have the vehicle parked out side with the lighting similar to what you see here or have it on display in a dealership showroom.  Some ideas to think about anyway.  A total of 29 hours is the count now for this project.  Time well spent. Enjoy the fruits of my efforts with this latest installment.

Thursday, August 13, 2015

Blender 3D VW Bus Project Part 3

There is an expression that has been around for decades.  That being "Clothes make the man".  In the case of my Blender 3D VW Bus it's more like "Wheels make the van".  So is the case with the third installment with my creation of this great looking vehicle. 


I was able to copy the wheels and tires from my Blender 3D VW Bug project and bring them into this model.  This saved me a good amount of time trying to recreate something that I already had completed.  The wheels and tires really set off the vehicle already and I'm not even close to completing this project. 


Along with the wheels and tires I've added the rear louvers for engine compartment at the rear quarter panels.  This was one of the easier tasks to do as it was simply a matter of making one louvered shape and then duplicating it for the set.  Then the entire set was mirrored over to the passenger side of the body to complete the task.  Turned out very well for a little bit of effort. 


The black and chrome trim that runs around the complete body took a little figuring out to do.  This being because of the dis-similar sides of the body.  With the additional passenger doors on the passenger side of the body the trim needed to be made up in several section to allow for the door seams that the body has. Once I found a good shape for the chrome trim it was just a matter of duplicating it over and over for each section of the body.  Only the trim on the front and rear corners of the vehicle were mirrored to get it to match on both sides of the body.  Not a difficult task but like any car model it is time consuming.  What you see here has now come up to 23 hours of work..... or again I should say "play". 

 The lighting in the second picture works out very well for the project and most likely will be used in the final renders for this project.  Lots to do yet before I get there but I am making progress and liking what I've been able to create so far.  I hope you agree with that thought.  Enjoy the images.  More to come soon.

Monday, August 10, 2015

New Tools Coming To The Tinker's Workshop!

I have been a big supporter of a site called Kickstarter that has been online for some time now.  This site helps people with new products and ideas bring their creations to market.  Everything from a new movie idea to robots have been funded on Kickstarter.  On the site you will find video presentations of a new product or project that a group of people want you to support so they can reach their funding goals to get their new ideas out to the world.  You can be first in line to purchase a new product at a reduced price and help get a new industry off the ground at the same time.  


I have supported a number of smaller projects on the Kickstarter site over the past couple of years and I am always on the lookout for new tools for the workshop.  So I was really happy to find and support a new product that reached it's funding goal yesterday.  A small company in Australia named Toolbotics has created a new tool that I can't wait to get my hands on. It's called "Tooli".  This is a multi-function robotic CNC tool that is able to laser engrave, cut vinyl for signs, air brush drawings on t-shirts or any flat surface, and can pick and place parts for pattern designs.  This is just to name a few of the functions that this machine can do.  

  In the video I have below you will get a better idea of what this machine looks like, can do and how it all works.  It will be a valuable addition to the workshop and the projects that I create. Funding for the Tooli reached it's goal of $48,000 easily by raising over $66,000 to get their product into production and on the market starting early next year.  Until that time I will have to patiently wait for delivery of my new machine which will not be until March of 2016.  

The machine comes in three different sizes.  The smallest machine has a working area of 16.5" x 12" x 3".  The medium sized machine's working area is 23.6" x 16.5" x 3" and the largest machine is double that size with a very large working area of 33" x 23.6" x 3".  The price difference between the medium and large machine was only $25 dollars so it was a no-brainer when it came to deciding what machine to buy.  For what little more it cost to get the large machine it is money well spent.  I'd rather have the big machine and have the capability of covering all the bases when it comes time to put a project together rather than have the medium sized machine and finding out I needed the machine to be just a couple of inches larger to do what I planned to do in the first place.  So it was an easy decision. 

  I have lots of time to work on a stand for the Tooli machine and I already have several ideas for it's design and options as to where I am going to store it when it does arrive at here at the shop.  It will be a great addition to the line up of tools I already have and use in the shop.  I'll pass along any updates to this acquisition when I get them and remind you again when I finally have it in my hands and can start playing with it. Check out the video below and also check out the Kickstarter website.  You may find something that you could use in your workshop or hobby room that you can help get on the market for the world to see. 


Sunday, August 9, 2015

Blender 3D VW Bus Project Part 2


I've made some nice progress with the VW bus today with almost all of the panels for the body laid out and looking very close to where I want them.  As I said in my earlier post I am still learning new things when it comes to Blender and today I did just that.  I wanted to duplicate just a portion of the driver's side body so that I could use it on the passenger's side of the vehicle.  I did a little searching online and found that I can make a copy of a part and then change it with a command (Ctrl-M) and then add X,Y, or Z to get the direction I want the part to be mirrored.  This worked out great in being able to create the doors that are on the passenger side of the bus.  Saved me a lot of time and effort and the results look great. 


Once I am completely happy with how the body panels are lined up in the 3D model I will start laying out trim on the body, door handles, window trim, etc.  The plus side to doing the windows is that once I have one made I can duplicate the framework over and over and just plug them into the openings that you see here in the body.  


The rear of the bus is actually pretty simple in design and I could open this portion of the bus up also in the final model but at this point I'm not sure if I will or not.  I could set up several different views of the same bus with different doors being opened but that can wait until later.  
  I will also have to track down more reference photos of the interior for the bus to get it laid out correctly.  Again that will be farther down the line when I am fussing with more of the details at that point.  Total hours now on the model have climbed to 17 at this point.  Seems like a lot but I know I still have a long way to go before I can sign off on this project and say "Yep.... It looks good to me!"  Enjoy the photos.  More to follow in the coming weeks.

Saturday, August 8, 2015

Blender 3D VW Bus Project Has Started


Between various projects that I have been working on here at my house that I've put off for way to long and the major road construction that is also taking place on my street I've started my next Blender 3D modeling project.  What you see here is a very good start to a 1960's era VW Samba bus.  Since my VW Bug project turned out so well I thought I would do the VW  bus this time around and see if I can do it justice as well.  The bus as you can tell is way different to model than the VW Beetle.  Even while planning this Blender model I've had to rethink my process for modeling it completely compared to the Bug.  This being because the bus has two different sides to the body.  On the drivers side there is only the drivers door.  On the passengers side of the vehicle there is the front door and also two more side doors for the rear passengers. I plan on modeling the interior once again in this model and I want to have these side doors open to get a better view of what is inside.  That is the plan anyway. 

  The image above as I've said is a good start but like any project it all takes time and Blender is no exception in this case.  It has taken me 13 hours just to model what you see here and I suspect that this model like the VW Bug will be a minimum of 100 hours to complete.  Another challenging project that will be fun to figure out using Blender. 

  Some of the parts like the wheels and tires I can borrow from the VW Bug and I think it will look just fine.  I want to keep this model as true to the original vehicle as I possibly can.   It pays to do the research and I've found some good photos online for this purpose.  One feature that I want to put into this model is the front windows that open outward for ventilation.  Also I am thinking about having the sun top roof open as well.  So I've got my work or should I say my play laid out for me.    

  Another note about creating what you see here.  If you'd like to be able to make your own Blender models of your favorite cars I highly recommend purchasing the DVD from CGMasters "Car Modeling and Texturing" by Christopher Plush.  This DVD can be purchased from the Blender.org website and it has gotten me started making what you have seen already with my 1927 Bugatti and the 1963 VW Beetle that I've posted about a couple of months back.  Well worth the money with easy to follow instructions on how to create what you see here. Lots of info and lots of fun to work with.  Plus I am learning a lot of new things by working through the DVD to make these vehicles. So check it out when you can find the time. I'll post more about this project as I get farther along with it to keep you up to date on how it is coming together.