
Today in part four of the motorcycle cargo build I will show you what is needed to be done on the tail light assembly of the trailer along with build of the sides of the cargo floor and box. Like all of my posts in my blog photos speak volumes.


I cut out the center openings of the light panel first with the hot knife tool. That's it with the yellow handle and a black 90 degree guide. Looks kind of like a screw driver handle with a metal rod sticking out of one end and the electrical cord sticking out of the opposite end. A great tool for cutting foam.

Another complicated looking part completed with a few simple steps.

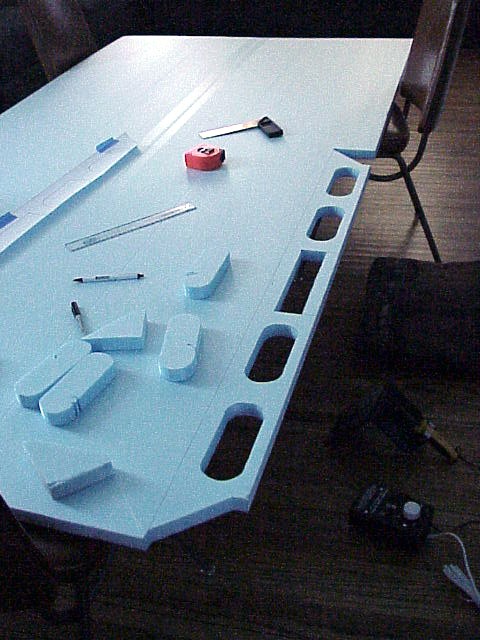
After all of the cutting including previous posts this is all that was laying on the floor. Very little debris from the hot knife cutting foam. A far cry from trying to cut the foam out with any type of saw.


Here the perimeter material is being removed to leave a knife edge for one of the tail lights.


Here the light gasket is checked with the new opening to make sure it 's a good fit.


This is an inside view of the lights mounted in the panel. The center of the panel will be modified for the mounting of the license plate in the body of the trailer. It was simpler to leave this alone for now just so that there was enough strength in the panel so it would not break while checking the mounting of the lights.


Another large piece of one inch foam will be added to the outside lower panels to make pockets and cavities for the marker lights.


To start the tail light assembly I started with a full sized paper template which I traced on to the one inch styrofoam sheet.

Using a Sharpie pen I darkened the tracing for easier viewing when cutting out the tail light panel with the hot knife tool.


All the openings are cut out and ready for the panel to be completely cut out from the foam.

Another complicated looking part completed with a few simple steps.

After all of the cutting including previous posts this is all that was laying on the floor. Very little debris from the hot knife cutting foam. A far cry from trying to cut the foam out with any type of saw.

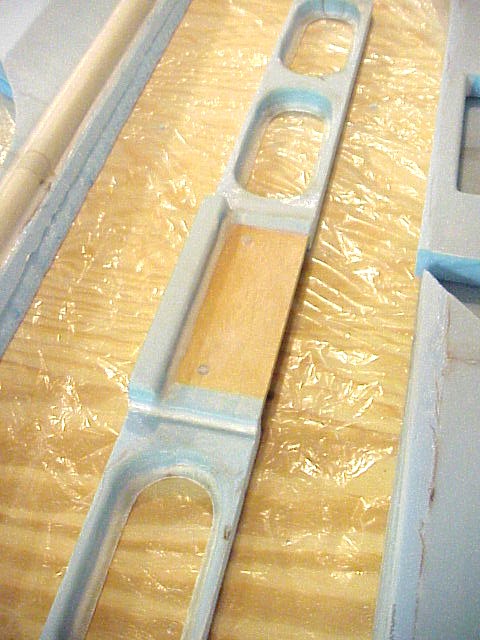
After one side of the panel has been glassed, the hot knife was used to cut an inner perimeter to get a knife edge for the tail lights.

This is a good close up view of the perimeter material that will be removed.

Here the perimeter material is being removed to leave a knife edge for one of the tail lights.

]
All the foam is removed now from the opening leaving a nice knife edge made of fiber glass.

Here the light gasket is checked with the new opening to make sure it 's a good fit.

All the opening are cleaned up and lights are checked for fit. A very nice look so far.

This is an inside view of the lights mounted in the panel. The center of the panel will be modified for the mounting of the license plate in the body of the trailer. It was simpler to leave this alone for now just so that there was enough strength in the panel so it would not break while checking the mounting of the lights.

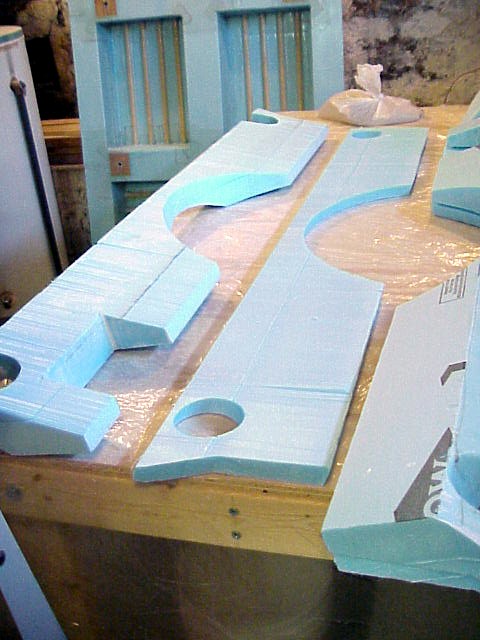
Four inch thick panels five feet long are next cut and shaped as shown for the lower sides of the trailer assembly. The large circular cut out is where the fenders will be mounted and the smaller holes are for the side marker light mounts that have already been made.

This is where the hot wire table paid for itself. The sides of the lower part of the trailer are cut lengthwise into the shape shown on the left. The right being before cutting.

A large modification was possible because of the hot wire table and the tilt bed that I designed for this project. The small opening for the side marker lights were cut out to make the "U" shaped openings.


Here are several more views of the nearly completed panels. The fenders were a perfect fit and helped keep everything upright for these photos.

Next an "L" shaped cutout was made to the upper mid section of the panels to accept the PVC tubing that will house the electrical wiring for the side marker lights.


The side panels have PVC plastic tubing mounted to them using fiber glass resisn/putty. The tubing is held in place with painters tape until the putty has cured over night. A very clean installation. The tubing will house the electrical wiring for the side marker lights so that there are no loose wires in the cargo area of the trailer.

The inside of the panels are glassed at this point. The trailer actually is built from the inside out with the glassing done on the inside first and then the outside will come later. It will make more sense as to why it is done this way as we go farther into the build in later posts.

Another large piece of one inch foam will be added to the outside lower panels to make pockets and cavities for the marker lights.

Lots of dabs of foam glue was needed to hold the panels together. The glue looks like regular wood glue but when it has hardened it still can be cut with a hot wire tool. Regular wood glue will hold pieces together but will not let a hot wire melt through it.


The panels are checked for size with each other and glued together.

Being as the panels were such and irregular shape the the simplest way to hold the parts all together was to use sand bags to weight it all down. Simple solution to a difficult problem.


The rectangular pocket in the panels was set up for a clearance light on the flat bed trailer. I originally was planning on being able to remove the body of the cargo trailer so that the flat bed still could be used. This turned out to be not so good of an idea as it would take me way to long to remove the cargo body and put it back on to make it worth while. The opening for the side marker light housings were perfect though and allowed for easy access to the wiring should a light need to be replaced.


These two photos show one of the side maker light openings with the inner cover mounted on it. The cover hides the light inside the cargo area and keeps it from being damaged by anything moving around in the trailer. The cover can be easily removed to access the light and wiring should they need repair.

Here is a good shot of the rear tail light assembly with the license plate hard mount glassed into place. This is nothing more than quarter inch plywood fiber glassed into place. This allows the mounting of the plate without crushing a foam core.

This strange looking piece is a sub-assembly of the lower tail of the trailer. It is made up of three layers of stryofoam sheeting that is glued together. The openings at the bottom of the assembly will allow the mounting of the tubing for the rear bumper to be mounted to the frame.

The tail light mounting panel is set on top of the lower rear trailer assembly. The cavity for the license plate now is starting to take shape.


The tail light panels is then glued to the lower assembly using foam glue. The painters tape helps keep everything in alignment and the sandbag on top puts pressure on the assembly to keep everything tight until the glue dries. The reason I use painters tape instead of regular masking take is that it peals off of the foam easily when you want to remove it after an assembly has dried.
So far the assembly of the trailer at this point has been a lot of parts and some sub-assemblies. It gives you a good idea as to the amount of work it takes to put a trailer like this together. It is not hard to do but it is time consuming. The plus side to all of it is that when you are done you will have a one of a kind trailer that fits your needs and will be exactly what you want. Plus bragging rights are priceless.
Incredible work! You deserve the "Bragging Rights"
ReplyDelete