Tuesday, August 28, 2012

The Makerbot 1/6th Scale Electric Car Model Is Completed


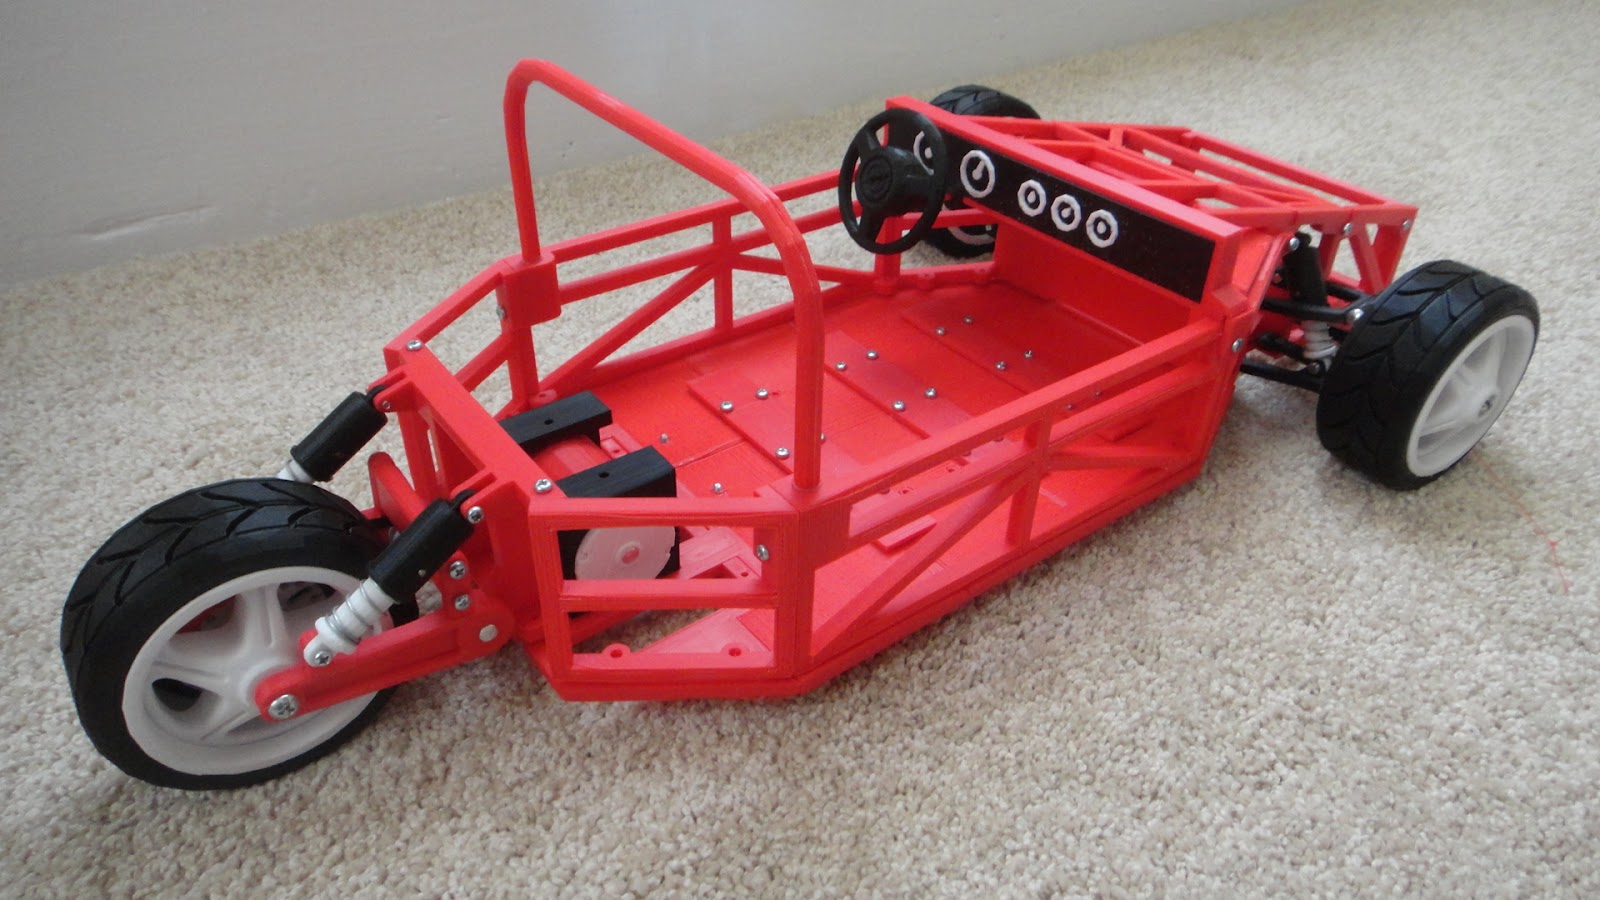
I am amazed that this project is already completed this morning.  No major problems and the assembly went together without a hitch.  Not to say that 126  hours of designing this project did not help with all of this coming together correctly. Add to this another 150 hours of making and assembling  parts.  This brings the grand total of hours in this project to 276 hours. Whew! A lot of fun to figure out this design and see it all come together though.  Here are are the final photos of the model.


This photo is the two part assembly for the head rests for the seats.  The two holes in the bottom of the red outer part will receive the aluminum mounting pins for the headrest to be positioned on to the seats.


Here the seat back parts are laid out to show you the assembly.  No glue was needed in the assembly of any of the parts of the seat.  All of the parts snapped right into place and are tight enough so gluing them together simply was not needed.


The seat backs are completed with the headrests and white inserts mounted.  It really makes the seats stand out with the contrasting colors.


This photo is of one of the seat bottoms.  These two parts alone for one seat took a little over six hours to print using the Makerbot 3D printer. It was a real nail biter while printing the last seat bottom with the red plastic.  I had very little left on the spool and was afraid that I would run out of plastic before it completed.  I had more red plastic on hand but it was not the same shade of red.  Luckily it printed out just fine and I was able to complete the assembly with no problems.


 Here one of the seats is completely assembled ready for mounting in the model car.  An aluminum pin is used in the base of the seat to allow for it to pivot forward as a real seat would in a car.  Again no glue was needed in any part of this assembly.  My efforts in the designing of this model paid off with the fit up of all the parts and the completed look.


These three photos are some good shots of the model by itself and a figure in the drivers seat.  


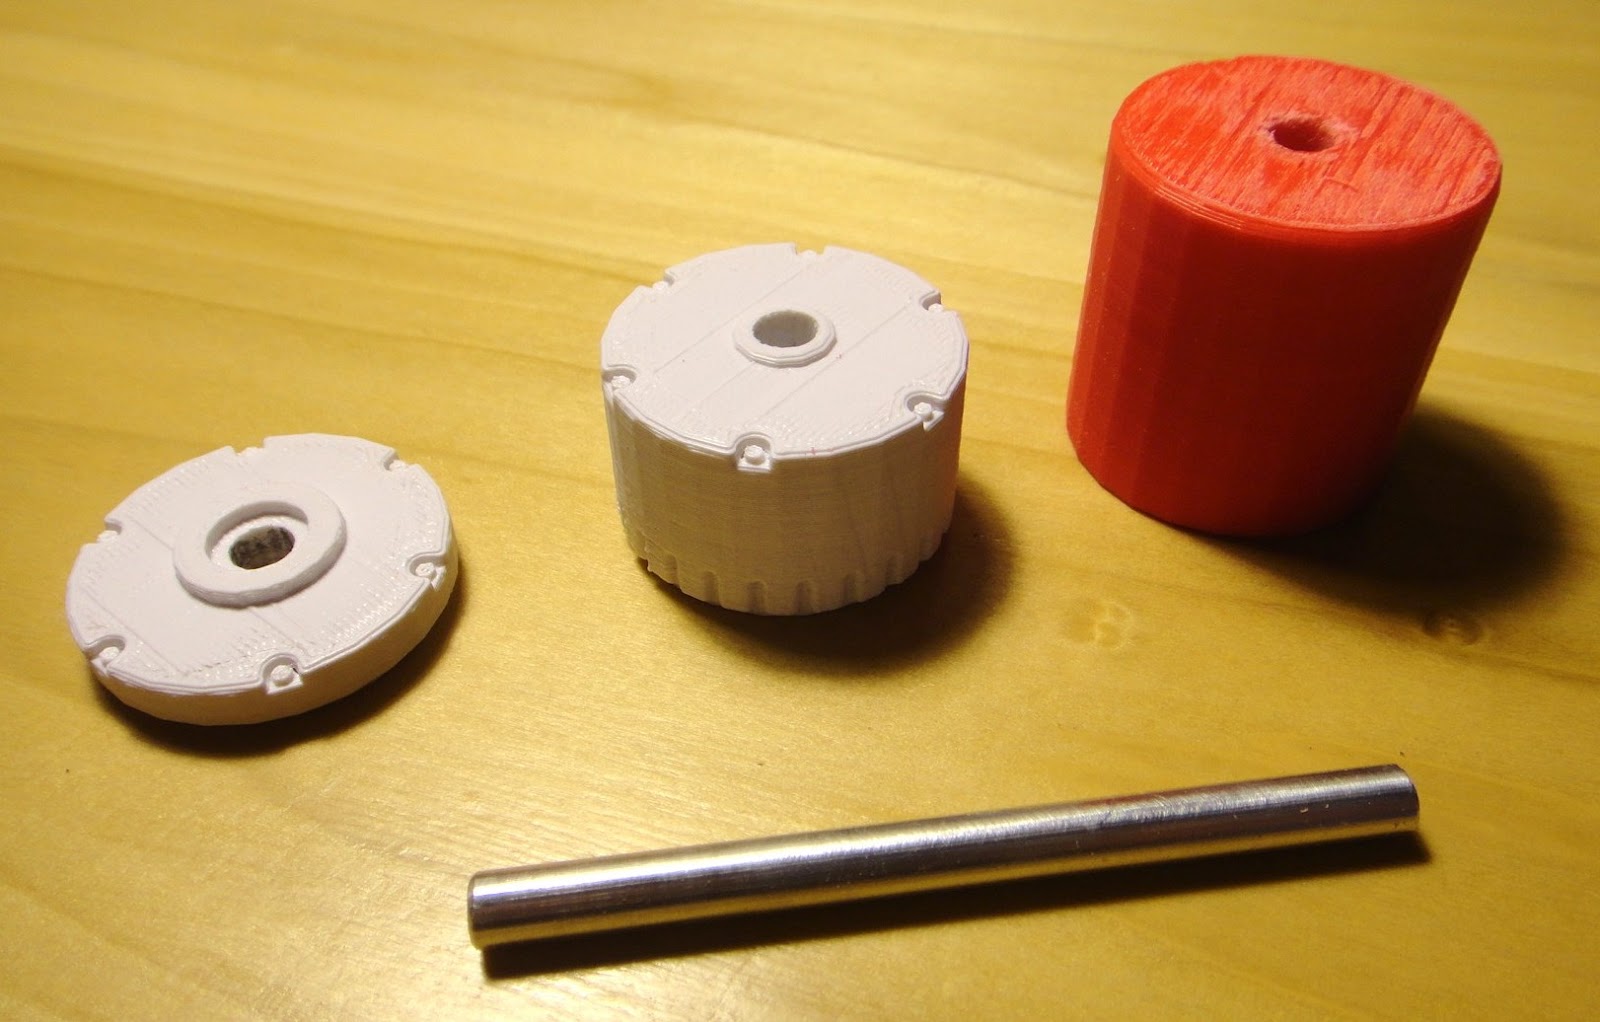
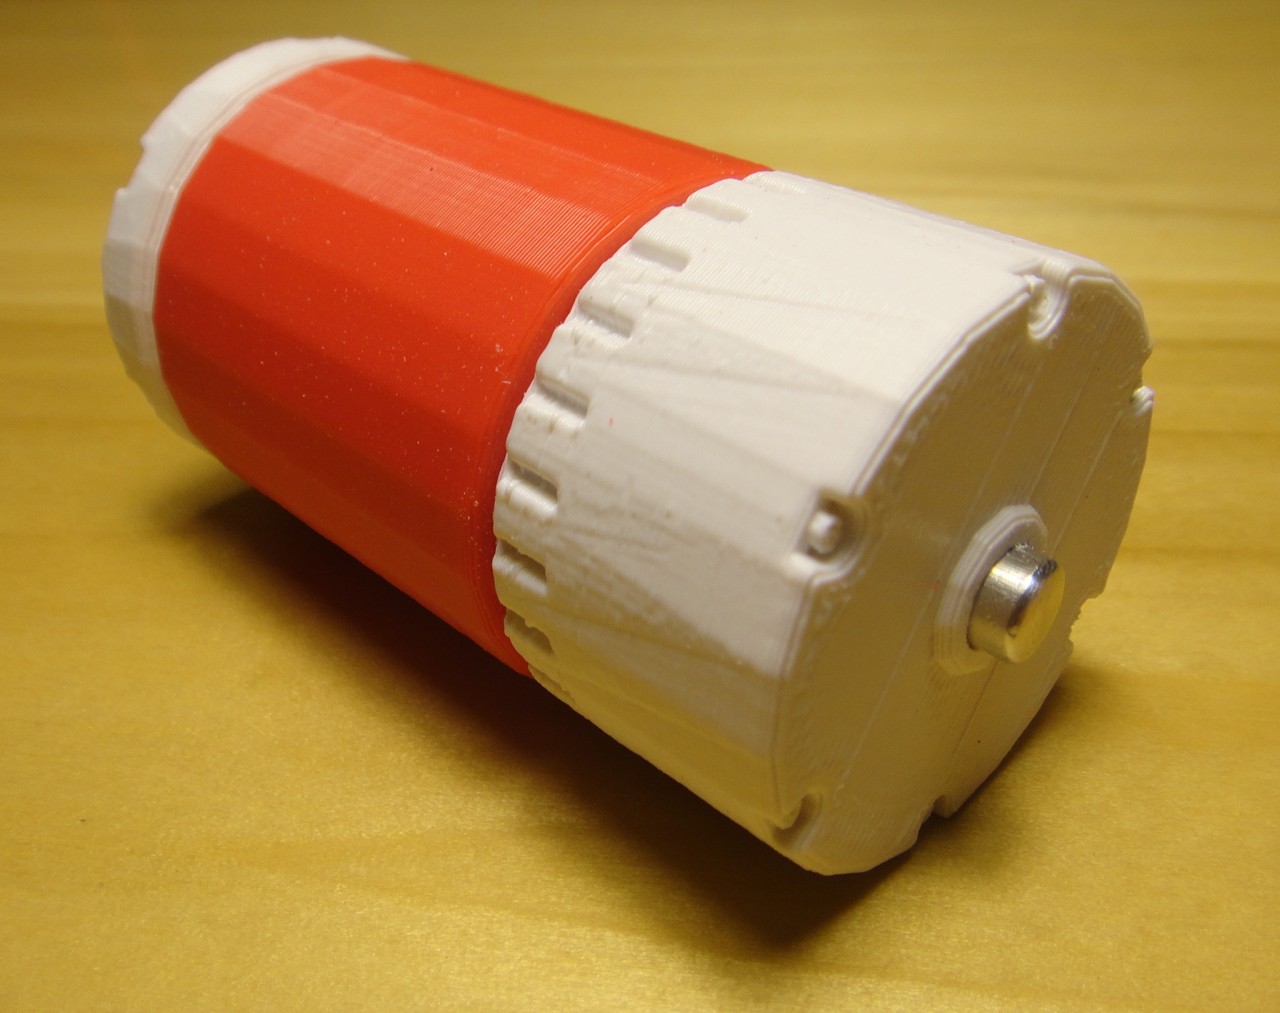
These last two photos are of the belt drive system that ties the electric motor to the rear wheel.  The belt was printed on the Makerbot 3D printer and is not flexible. The pulleys are made in two parts so that the belt could be mounted onto the motor and the drive system.  It all turned out very well. 


One last photo.  I think the underside of the model looks just as good as the top side.  As you can see, lots of machine screws to hold it all together.  Pretty though don't you think?

  The next step will be to possibly build a fiberglass body for the model.  I have a couple ideas as to how this can be done but as yet have not started work on it.  I think I will sit back and admire my efforts for now and do some thinking on the next phase of this project.  I hope you've enjoyed the photos and info that I've passed on to you over the past month or so.  If I get the body figured out I will post that as well and keep you up to date.  Either way I think my efforts on this project have once again turned out very well so it's all good.

Thursday, August 23, 2012

Battery Packs Installed In Makerbot Electric Car Model

The past couple of days have brought another jump forward in my efforts to complete the 1/6th scale Makerbot electric car model along with a marathon session of printing parts.  Here's what I've managed to get done.


With the addition of the battery box assemblies to the model it is getting to look more complete and definitely more colorful.  Total number of hours to print the parts for the battery box assemblies comes up to just five minutes short of 22 hours.  Yesterday being the longest day with the printing of the battery box assembly that mounts behind the seats of the model.  The box alone took seven hours to print.  I was just happy that the print did not fail on me and I would have had to start it over again.  But with the Makerbot being what it is I once again am pleased to have set a new personal record for print times with this part alone.  


The smallest of the battery box assemblies is this one which would be the size of a regular car battery if it was in a real car.  This is mounted to the motor mount assembly and all the machine screws are hidden inside the battery box itself so that I could get a nice clean installation. 


Just ahead of the motor and what will be behind the seats once they are printed and installed is the main battery box. The hardware to mount this box is fed up through the floor of the model into the base of the assembly to hold it in place.  This assembly represents 17 lithium batteries housed in a battery box container.  It is to scale so it is interesting to see how little space it actually takes up considering that the other battery is the size of a regular car battery.  All the battery posts were painted silver to give them just a little bit more detail in the model. 


This view of the model show you the two front battery box assemblies.  The real puzzle to solve in the installation of the assemblies was how to mount them and still allow room for the front rack and pinion steering to still work.  This was accomplished with mounting brackets on the bottom of each assembly that holds them in place to the floor of the model.  The front battery box assembly will need to be removed once the steering column is installed with the gear to mate up with the rack on the steering assembly.  There is not a lot of room to get your hands into the model with the front battery box in the way.  It is just simpler to remove it until all the other components have been put into place.


This view shows you a good perspective as to the component layout in the model.  The blue box just ahead of the dash is the motor controller for the electrical system.  Needless to say that if this was built for real with a fiberglass body it would need access panels to get at the electrical system and batteries.  Most likely the front of the vehicle would have a hood that opened up of even have the entire front end tip forward for easy access.  The batteries behind the seats are pretty much in the open and would only have to have a cover over them to protect the batteries and passengers. It would also  allow additional cargo area behind the seats.


The next step in the assembly will be the printing of the seats.  This will take me a couple of days to get done along with a few smaller parts that will be needed to complete this portion of the model.  Once I am happy with all of this I will look into making a fiberglass body to complete the model.  This all depends on what it will take to put that part of the assembly together.  Even if I stop at this point and don't build a body, the Makerbot electric car model is still quite impressive to see and has been a lot of fun to create.  Like everything else that I work on here at the Tinker's Workshop. That should be the motto of  my site.... "If it isn't fun then why bother". 

Monday, August 20, 2012

1/6th Scale Makerbot Electric Car Model Is Rolling

After printing the remaining parts late last night for the frame and floor of the Makerbot electric car model I just had to get these photos taken and show off my efforts.   So here are the latest photos along with more interesting facts about the model and possibilities of it being a real vehicle some day.


These views of the model give you a good idea of how large an actual car would be.  The model here is two feet long and the figure of a man standing next to the car is one foot tall.  If you do the conversion of numbers in your head and make the man six feet tall the car now would be twelve feet long.  I measured the height of the roll bar from the ground and it would be 42 inches tall.  A very low, small and light electric car to be sure.  Just what I was shooting for.  I got on a discussion about this being an actual vehicle some day and so far it looks promising.  There would be no doors on the car as it is so low that they are not needed.  The framework that encloses the interior of the vehicle is very low at only 23 inches high so it is an easy task to just step into the vehicle similar to a Lotus Super Seven or an old style dune buggy. 


In this view of the model you can see the working rear suspension and the electric motor assembly already installed in it's correct location. The front suspension of the model is wide.  It needs to be to make an actual vehicle that much more stable when cornering in a three wheeler.


This is a good shot of the motor assembly mounted to the floor of the model. The black mounts will hold an electric battery box on the top of the motor assembly once it has been printed on the Makerbot 3D printer.


This view again shows the rear suspension of the model on the left side of the model. A few of the pieces that were originally designed for the swing arm assembly in the rear of the car had to be changed to accommodate a new 1/4 inch aluminum shaft which cleaned up the assembly and made it simpler to assemble. The axle for the rear wheel and pulley was exactly the correct length at three inches so the nut fit on the end perfectly.  You can see the aluminum shaft that extends out of the swing arm and of the electric motor.  These will have a belt and pulley mounted to them both to complete the assembly.  This will probably be one of the last things done on the model as the swing arm and rear wheel assembly is mounted to the upper frame.  This upper frame will not be mounted to the floor of the model until the interior of the car has been installed with the seats and all of the battery packs.


At this point in the model build I am encouraged as to how well it is all coming together and makes the idea of actually building this vehicle for real some day more of a possibility.  A lot of interesting details have  been revealed with this model as to how big a real car would be and what kind of space is needed for a motor, batteries, seats, people and storage. It would be a very interesting and fun  vehicle to drive to be sure.  If anyone out there in Internet land is reading this and you have some ideas or questions for me about this project (or any of my projects) please let me know.  I encourage any and all comments and advise!  No matter what, like most of my projects I am learning new things once again here at the Tinker's Workshop and so that is always a good thing.

Saturday, August 18, 2012

Big Week This Week With Big Progress

This week at the Tinker's Workshop has been nothing short of crazy with all the progress that has been made on the Makerbot electric car model, my home life and believe it or not my dentist!  First off the progress on the electric car model was put on hold for a few days while I have been sorting out  other possible unexpected projects.  My faithful 17 1/2 year old Sony TV set died this week so I have been researching online for a new stand for the new flat screen TV that will replace it.  The problem has been finding a new stand that will fit on a small special platform in my living room where my  very old and now very dead TV decided to die in peace.  After a lot of research I found what I need so I have ordered the stand rather than try to duplicate it.  Simple was cheaper to do so.  Scratch that project off my to do list. 
  Along with this going on I had a dentist appointment this week to fix a cavity that managed to show up.  In the process of getting this taken care of I got into a conversation with my dentist about my blog site and the projects that I have been posting on it.  He was so impressed with what he saw that he has asked me to help him design a new piece of dental equipment!  You just never know what and where tinkering will take you. So that project is in the works for sure.  So without going any further here is the photos of the latest progress on the Makerbot electric car model for this week.


The floor for the chassis has been getting longer now with only a few more parts to print to complete it.  Lots of metric machine screws have been needed to keep everything together.  I am really happy with the alignment of the parts and with very little fussing to make it all work. 


These two photos are the front section of the frame for the model.  The panels that are mounted in the this portion of the model are the firewall and the motor controller mounting panel which is just ahead of the dash that you will see in the next few photos.


Here is the floor assembly with the front suspension installed and the front frame and passenger compartment side rails put together.  The dash mounted easily to hold the front and mid sections of the frame together.  The roll bar I printed in two pieces so that I could get a round bar instead of a square.  These parts were fastened together using modeling glue and then inserted into mating mounts in the side framework.  I set the roll bar up so that it can be removed if for some reason it should get broken (Heaven Forbid!).  If the roll bar was glued in place and it did get broken a lot more parts would have to be replaced to fix the model.  Just would not even want to think about going through that process so this is a nice precaution in the design. The white bar sitting next to these assemblies is a one foot ruler just to show you how large this model is getting to be.  


The steering wheel slide into the dash and mating mounting points in the front framework perfectly. I just need to print a new gear for the rack and pinion steering to make it all work. The new dash that I printed last week really stands out now with the black and white gauges in the  red framework.


I am printing the last few pieces of the frame and floor today and will post this progress when I get these ready for mounting.  I wanted to get this out while I had the chance to show you how it all is shaping up.  I will hold off in mounting the frame to the floor until more of the interior parts and electrical components have been made and mounted on to the floor of the model.  It will make it simpler to get these in place without the frame being in the way.  So with all that has been going on this week it is nice to see progress once again on this project.  Forward is always good!  Total hours printing at this point 86 hours 4 minutes. 

Tuesday, August 14, 2012

It's The Little Things That Make The Difference


Work still continues on the 1/6 electric car model as more parts are stacking up on the work table.  I made some nice progress on some of the smaller parts for the build with the completion of the dash assembly for the model as well as the assembly for the electric motor.


The dash assembly fell into place two days ago with the completion of the black and white printed center dash face.  This was accomplished with the Makerbot Replicator and it's dual print extruders.  This made it possible to print both the black and white parts of the piece all at the same time. This portion of the assembly took 2 hours 21 mins.  I think the wait was worth it.  The hardest part in making this piece for the assembly was just figuring out how to design it on the computer so that both the black and white parts could be combined on the 3D printer.  With some effort I managed to get it right the first time out.


These three printed cylindrical pieces and a short piece of aluminum rod make up the assembly of the electric motor for the car model.  I got some nice detail in this assembly by modeling recessed bolts and vent holes for the completed assembly in the two end pieces.


With the middle section of the assembly in a different color it sets off the model and gives it just a little more detail.  The 1/4 inch aluminum rod runs through the entire assembly which helps keep everything lined up.  The shaft is a nice snug fit so no glue was needed to hold the assembly together. The motor is 1.5 inches in diameter and is 2.75 inches long.


  I am very pleased with the Makerbot 3D printer being able to print such beautiful parts. Having the ability to print larger parts makes putting intricate details into these small assemblies and parts easy  and will make a big difference in the completed model of the electric car model.  It's the little things that make the difference.

Friday, August 10, 2012

Big Parts For A Big Electric Car Model

Work continues this week on the 1/6th scale electric car model here at the Tinker's Workshop.  I have been putting the Makerbot 3D printer through it's paces printing some large parts for the project and so most of the time has been just getting out one or two big parts in a days work.  With the parts stacking up I thought I better get another post out just to keep up with the updates that I have promised.  So here goes.


These first to images are some views of the possible body that I've designed for the electric car model.   The body will be fiber glass and will slide on and off of the frame to show of what is underneath.  I still have to work out more of the details on the body (lights, mirrors, etc) but it is slowly coming along.


The framework of the model is near complete with only a few more details to work out.  I had to allow for three more batteries in the model as what I had set up in the design was wrong.  There are 30 lithium batteries which in the real world would give a real car 96 volts.  One last battery needed to be added as a regular car battery is used in an electric car for running accessories.  I am learning a lot about electric cars and design with the building of this model.  Just the number of lithium batteries alone would cost around $6000 for the real thing.  Much cheaper to build the model.


Here are couple of good views of the front end of the model.  The framework is mounted using machine screws as the front suspension is now complete.  The front suspension as I stated in an earlier post has fully functional working shocks, rack and pinion steering.


This is a good  view of just the front framework starting to take shape.  There are only four pieces in this assembly which took over five hours to print.  This kills a day rather quickly.


Here is one of the larger parts of the floor for the model on the Makerbot heated build platform.  As you can see there is not much room left for anything else.  The build platform is 6 X 9 inches so it gives you a good idea as to how large this part is. 


This photo is of the framework that will hold the dash for the interior of the model.  It is 8 1/4 inches long.  The dash will snap into place inside this framework and the holes in the part will mount the framework to the front section of the model chassis framework.


Here the parts are starting to pile up.  Assembly cannot start until a few more larger pieces have been printed.  The upper part on the left side of the view is the dash framework.  Under that are the left and right front frames and beneath that are four connector plates.  The last large piece in the lower right corner is the firewall for the interior.  


The seats have already taken several different shapes over the past few weeks.  The black seat was the first attempt at a seat for the model.  I found this to be way too deep and so the next version with an improved headrest was created.  The seat was cut down on the sides to make a more believable seat for the model. 


The next idea for the seats is to make the back of them be able to flip forward like a real seat.  This is set up so that a person could have access to the small storage area behind the seats in the real world.  For my purpose it looks good and will actually make it easier to remove or put the fiberglass body on to the chassis framework. The seats will have an internal shaft which will allow the rotation of the seat back.  
  Lots more printing and designing needs to be done on the model and so I will keep plugging along to keep it moving forward. Hope you like what I've put together so far.